Microsof Entra (Azure AD / Office 365) integration
Go to https://thestorage.app/ and click on LOGIN/SIGN-IN button in the right corner top of the page.
Click on LOGIN WITH AZURE AD on the right side panel.
Sign in with your Microsoft account.
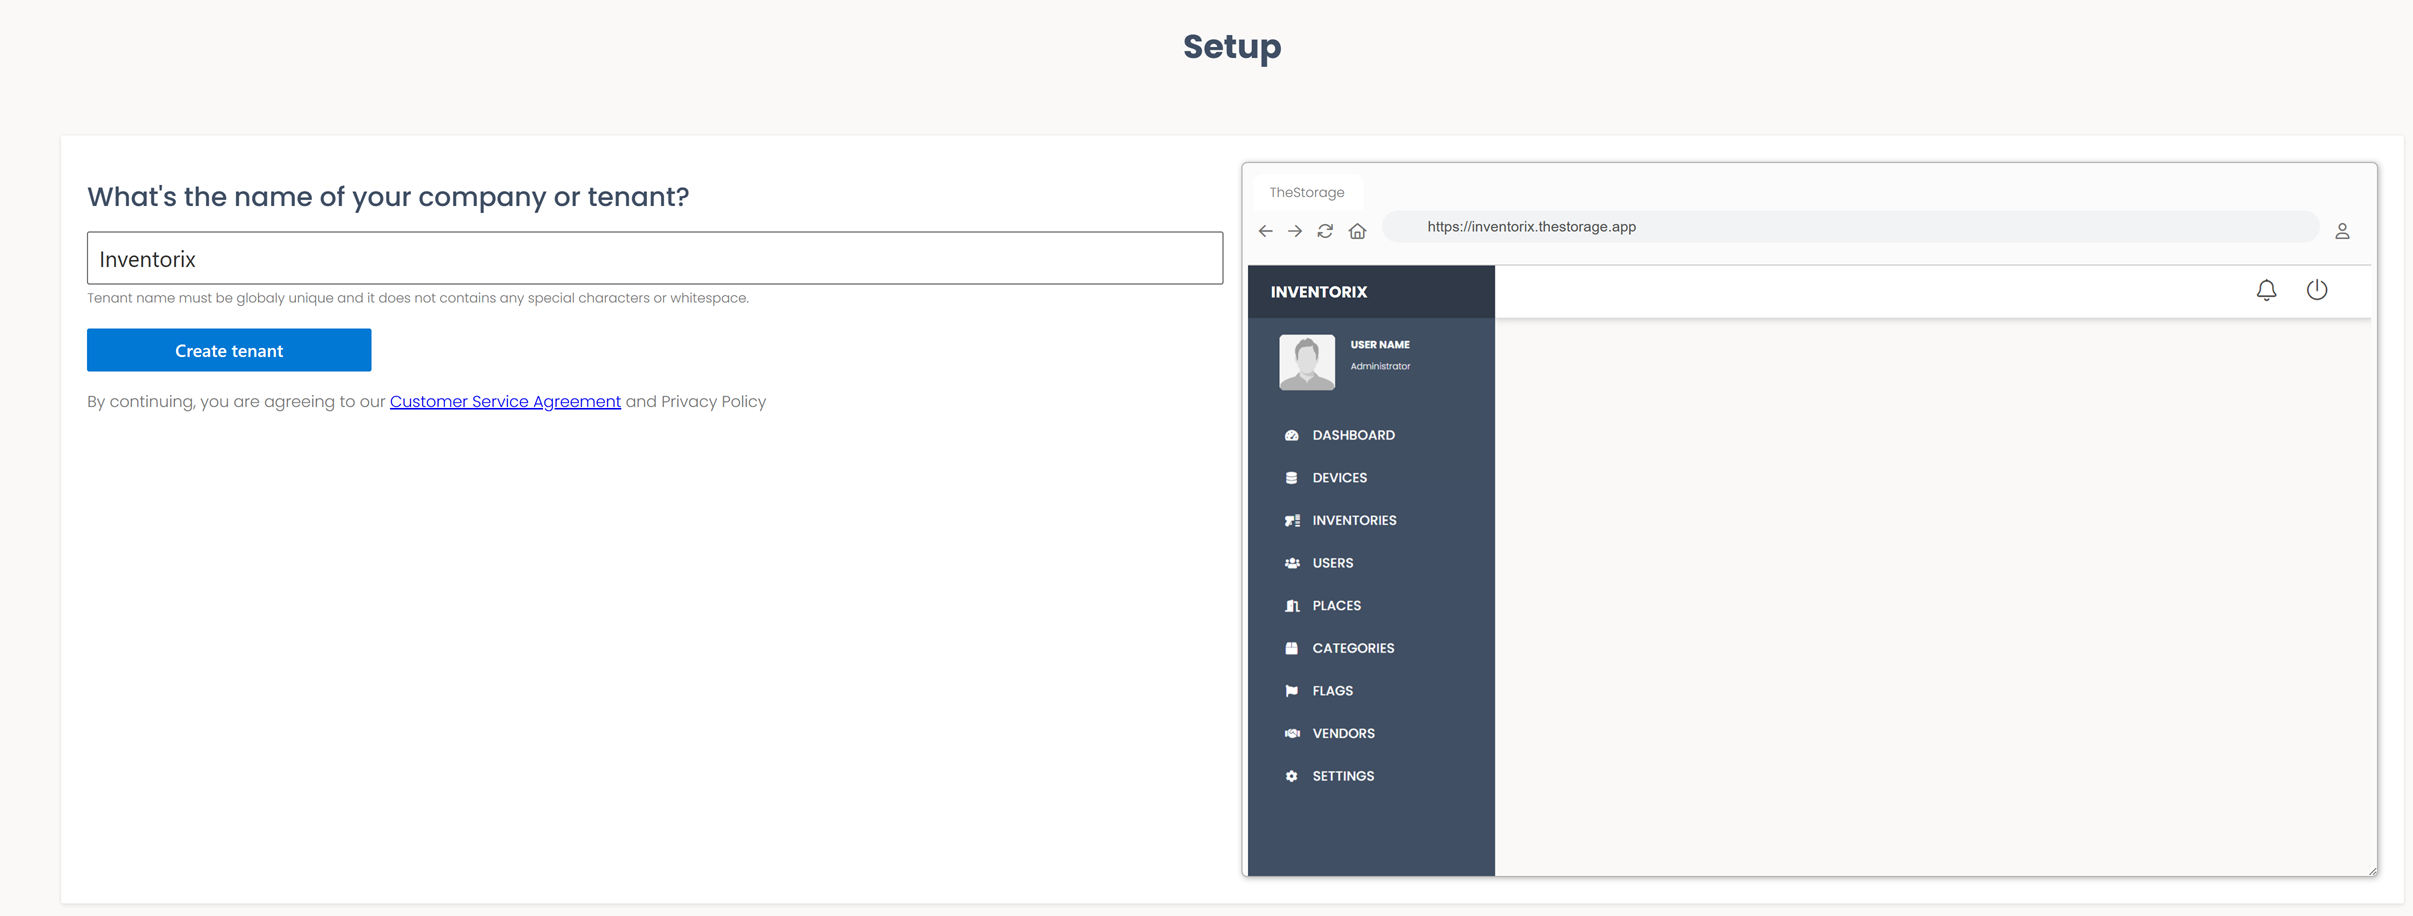
Setup page appears. Enter the name of your company.Tenant name must be globaly unique and it does not contains any special characters or whitespace. Click on Create tenant button.
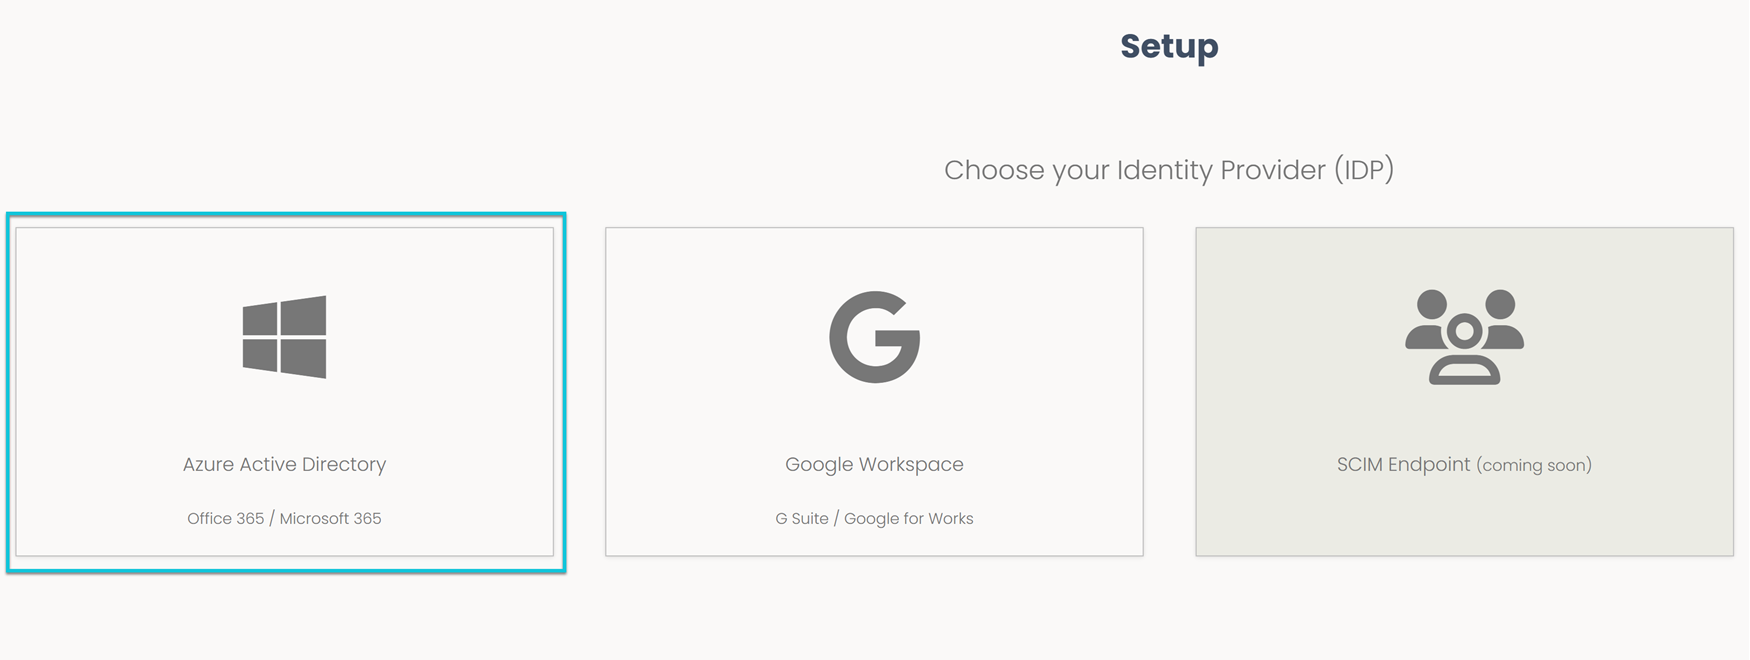
In the next step, you will need to select your identity provider. In this documentation section, we show you the Azure Active Directory option.
infoTo assign a device to an employee, it is essential to establish a connection between your company directory and TheStorage App. The supported directories for this connection are Azure Active Directory or Google Workspace (Google) Directory. Without this connection, the application administrator will not be able to assign items to users.
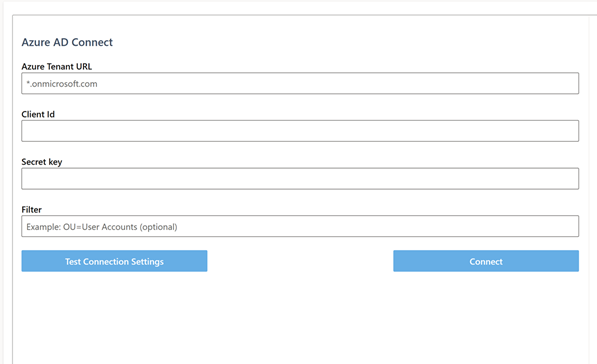
You have to fill in the Azure AD Connect Page. To do this, follow the steps ahead.
Open in a new tab the https://portal.azure.com/ page.
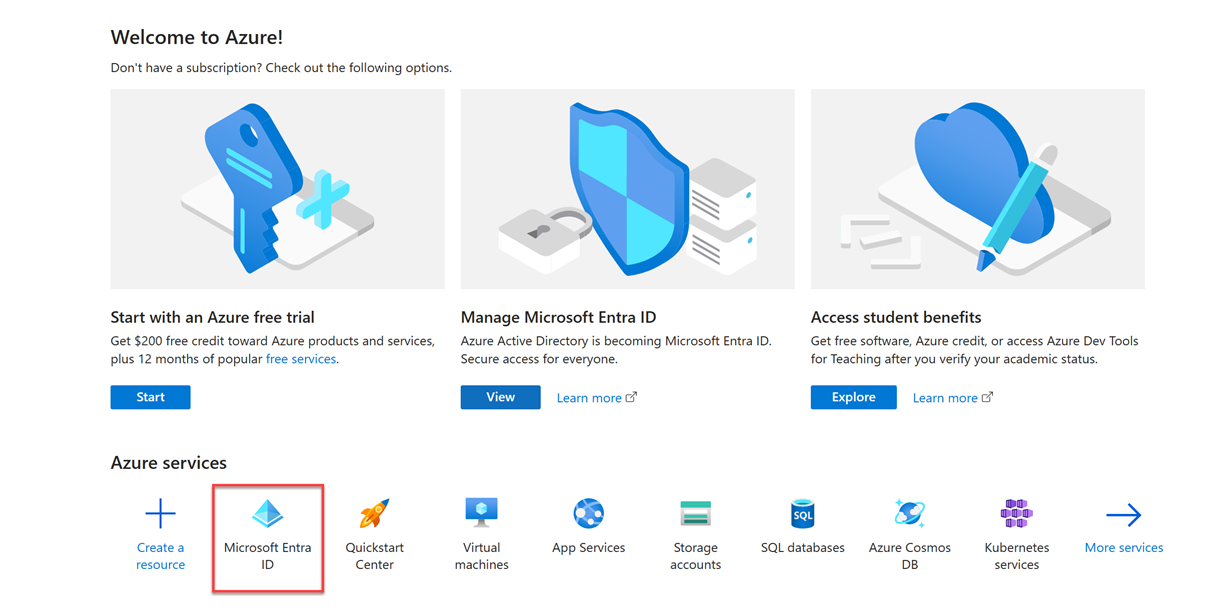
Choose Microsoft Entra ID from the Azure Services.
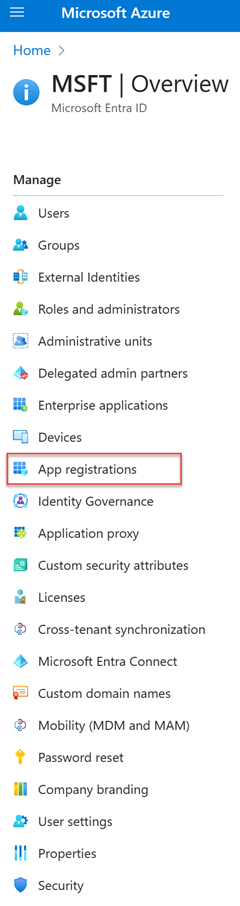
From the sidebar select the App Registrations menu item.
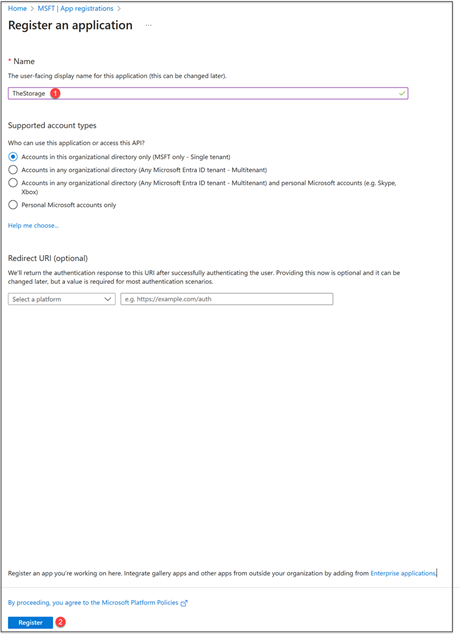
Click on the New Registration button on the top of the page.

Enter the name what should be TheStorage. Click on the Register button.
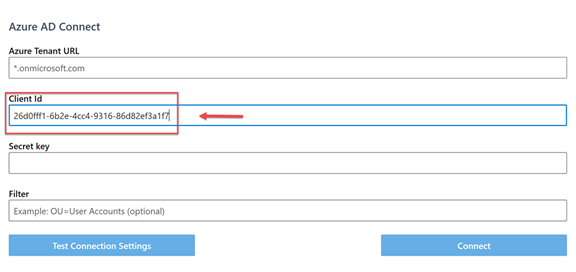
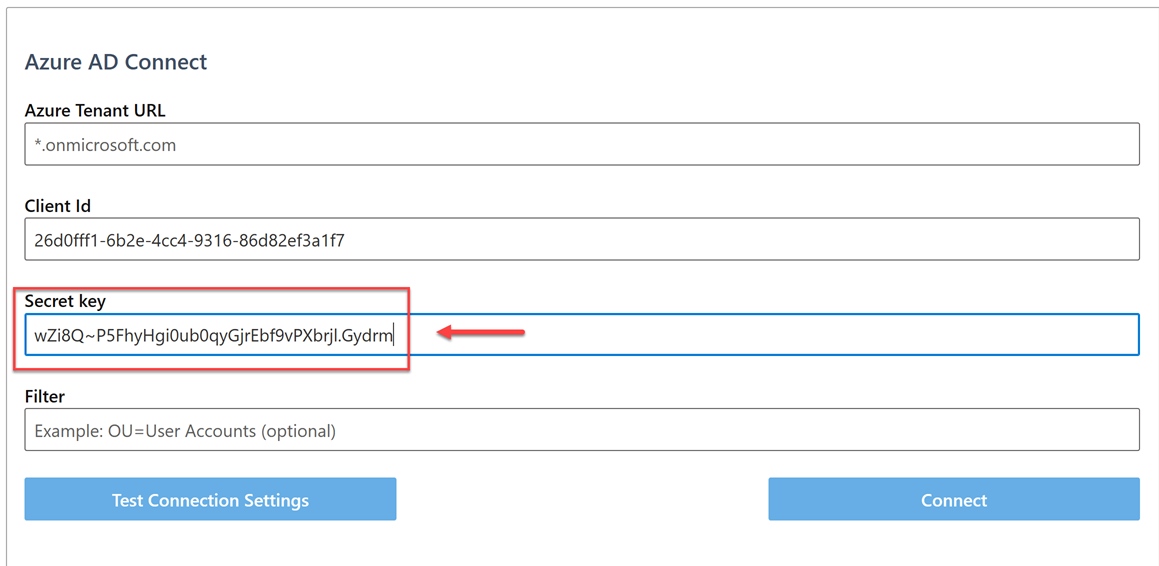
In the next page, you will see the Application (client) ID. You will need this for the connection. Copy it from here and paste it on TheStorage Setup page (on the other tab) into the Client ID textbox.
Microsoft Azure page TheStorage Setup page 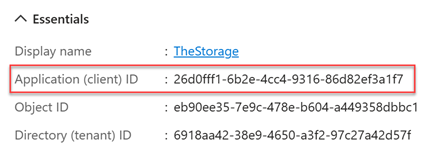
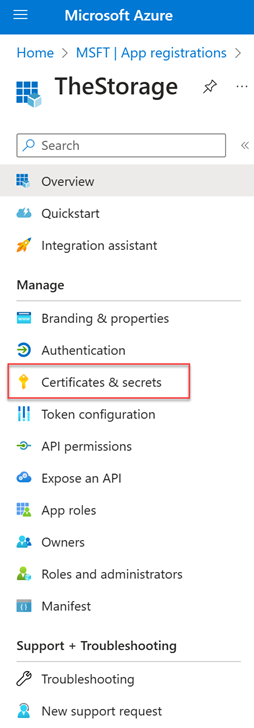
From the sidebar select the Certification and secrets menu item on the Microsoft Azure page.
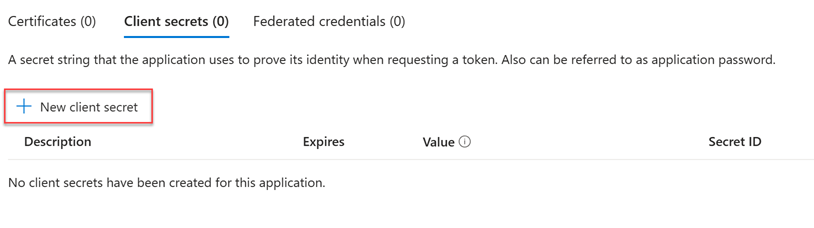
Click on the New client secret button.
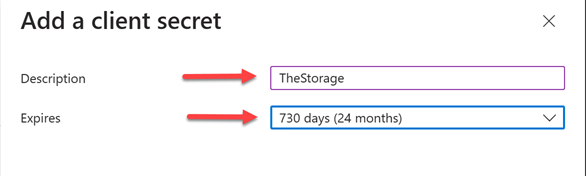
The Description should be TheStorage and the Expires should be 24 months. (You can select less, but it would need to update the key frequently). Then click to Add button on the bottom of the window.
Copy the secret value from here and paste it on TheStorage Setup page (on the other tab) into the Secret Key textbox. Note: after you leave this page, the secrets never show it again.
Microsoft Azure page TheStorage Setup page 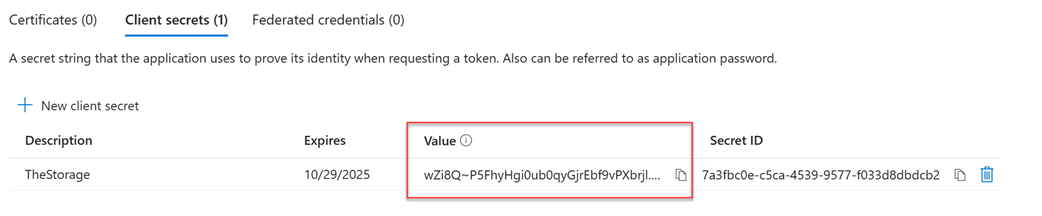
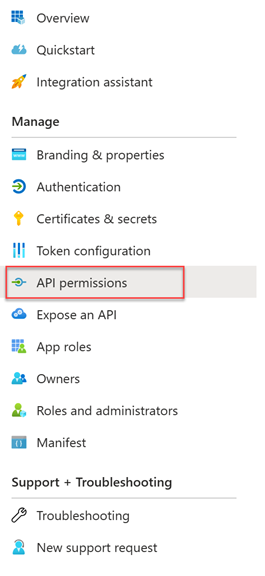
To read the whole directory the application needs permission. On the Microsoft Azure page, on the sidebar click on the API Permissions menu item.
Click on the Add a Permission button.
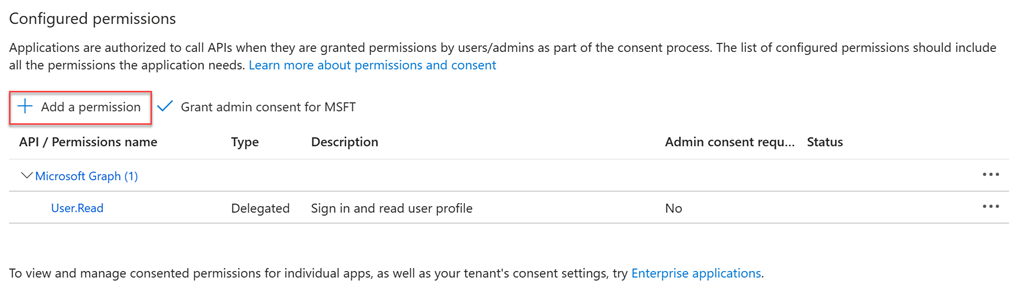
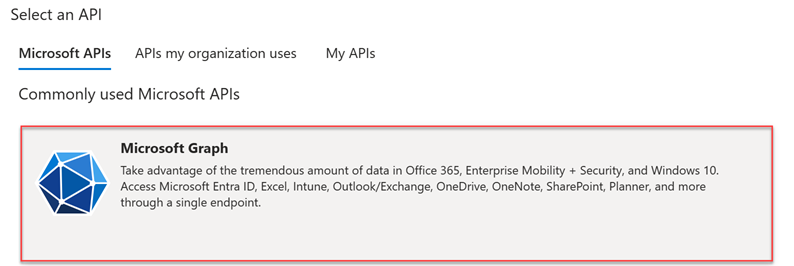
Form the Microsoft API’s click the Microsoft Graph top of the window.
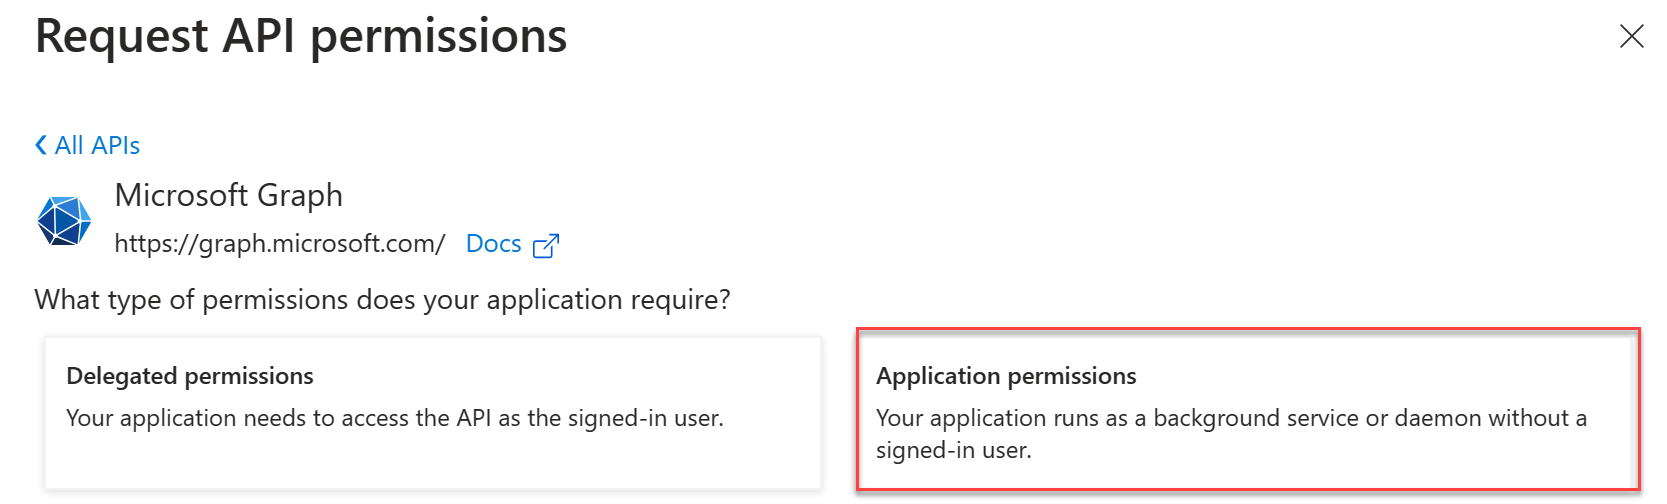
In the next step select the Application Permissions.
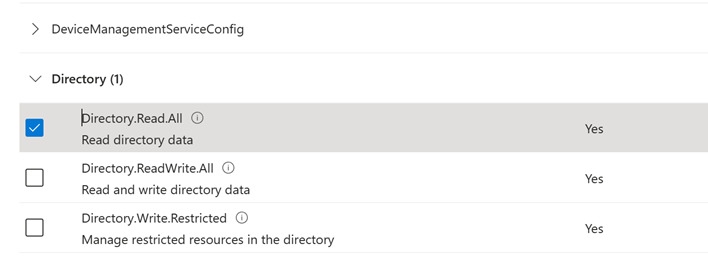
Then scroll down in the list and choose the Directory from the list. Click into the Directory.Read.All tick box. Only this item! (This item allows the app to read data in your organization's directory, such as users, groups and apps.) Then click on the Add permissions button on the bottom of the window.
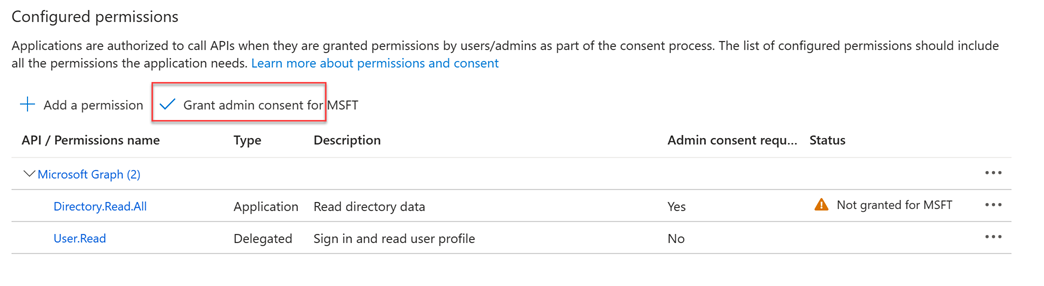
Click on the Grant admin consent for button and select yes on the Grant admin consent confirmation pop-up window.
Go back to TheStorage page on the other tab and provide the remain datas. Enter your domain into Azure Tenant URL textbox. If you have special filter in your organization unite, you can optionally provide.
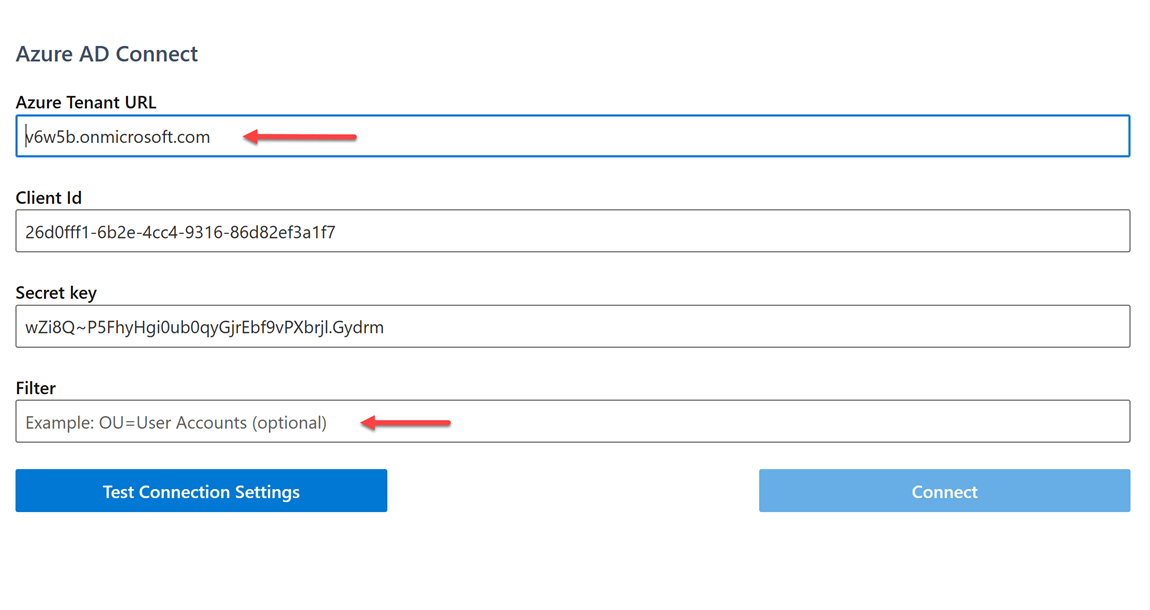
Go to Test Connection Settings button, then Connect button.
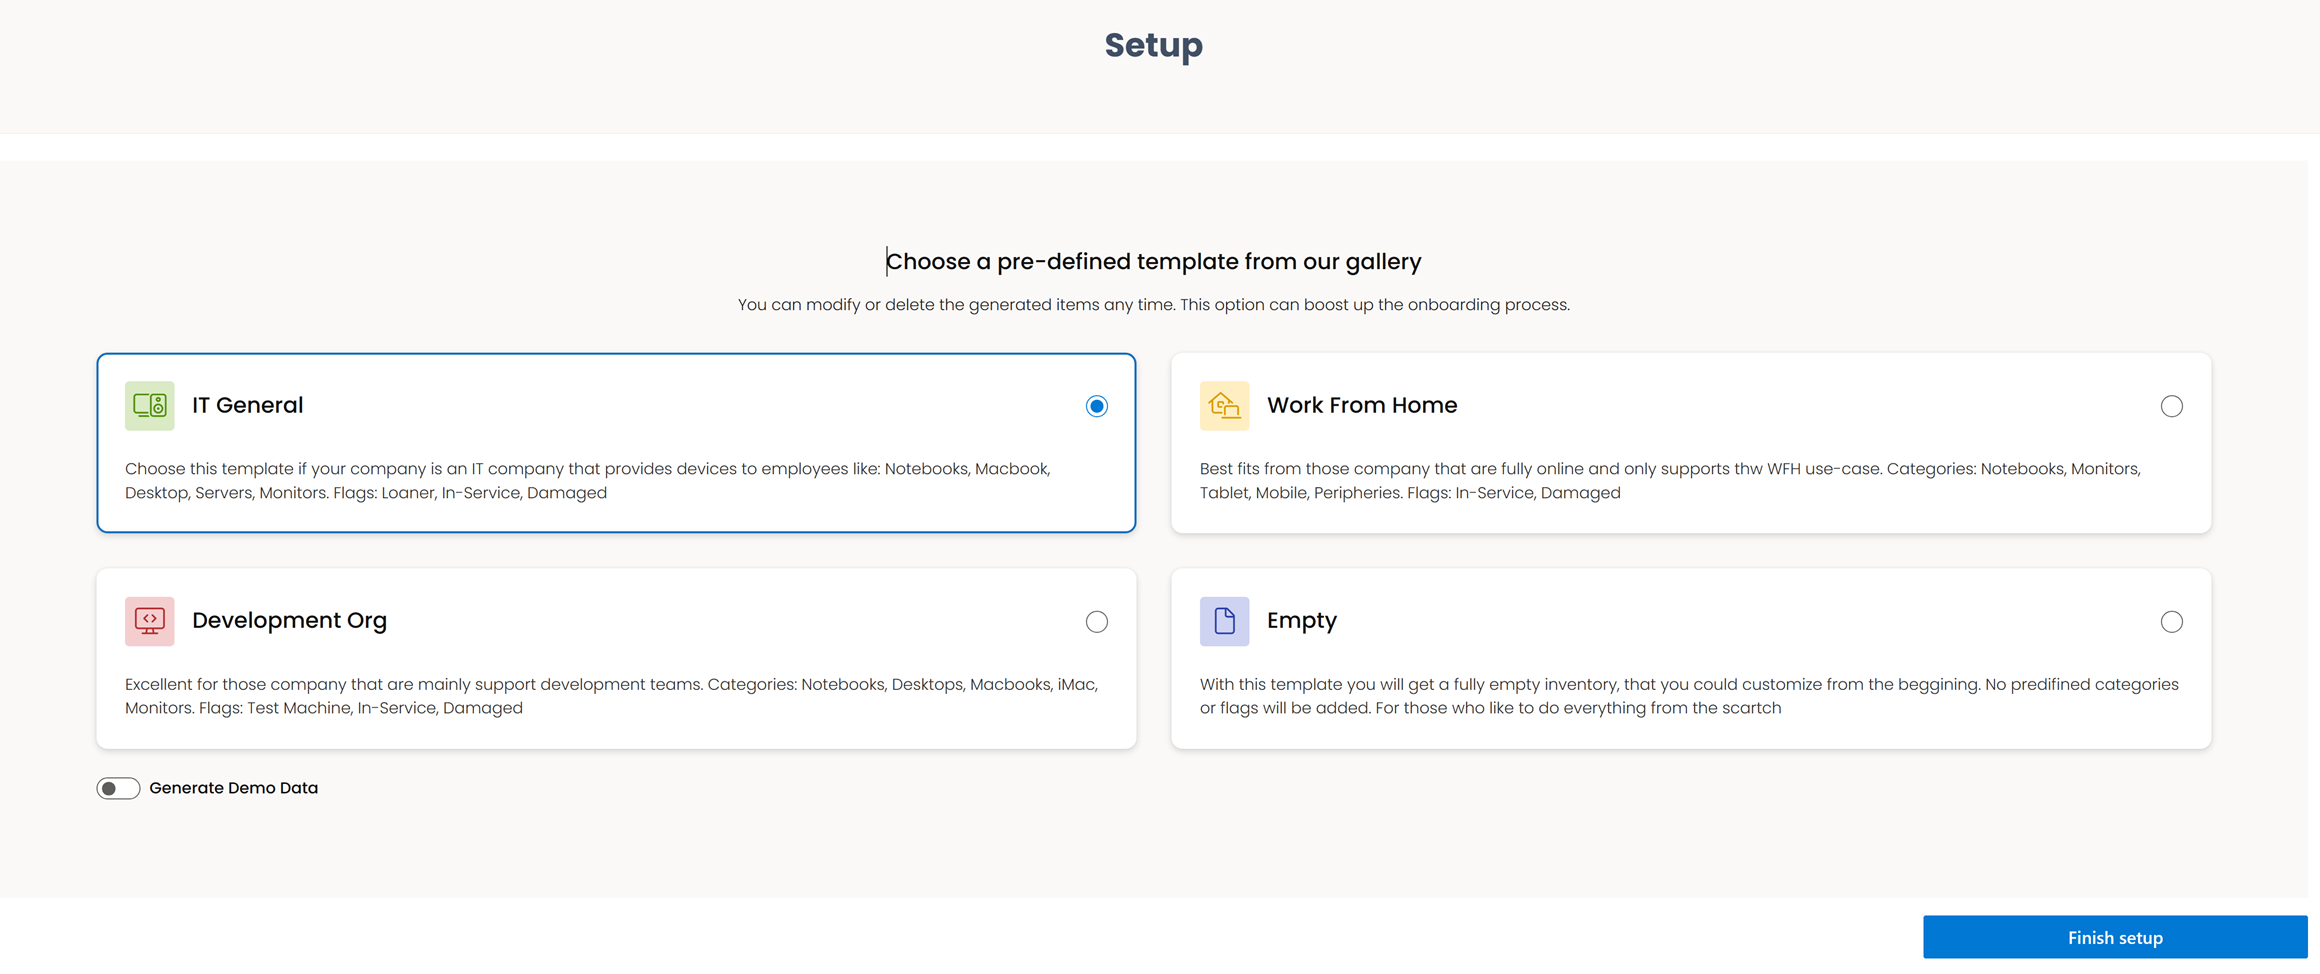
You can choose a pre-defined template for your application.