Campaigns
A campaign is an internal sale of used devices to your own employees, with proceeds donated to a cause your organisation supports. It's the cleanest path for retiring laptops and monitors that still have life left in them — better than recycling, simpler than a public auction, and good for staff morale into the bargain.
Create a Campaign
-
Navigate to the Store menu item on the sidebar.
-
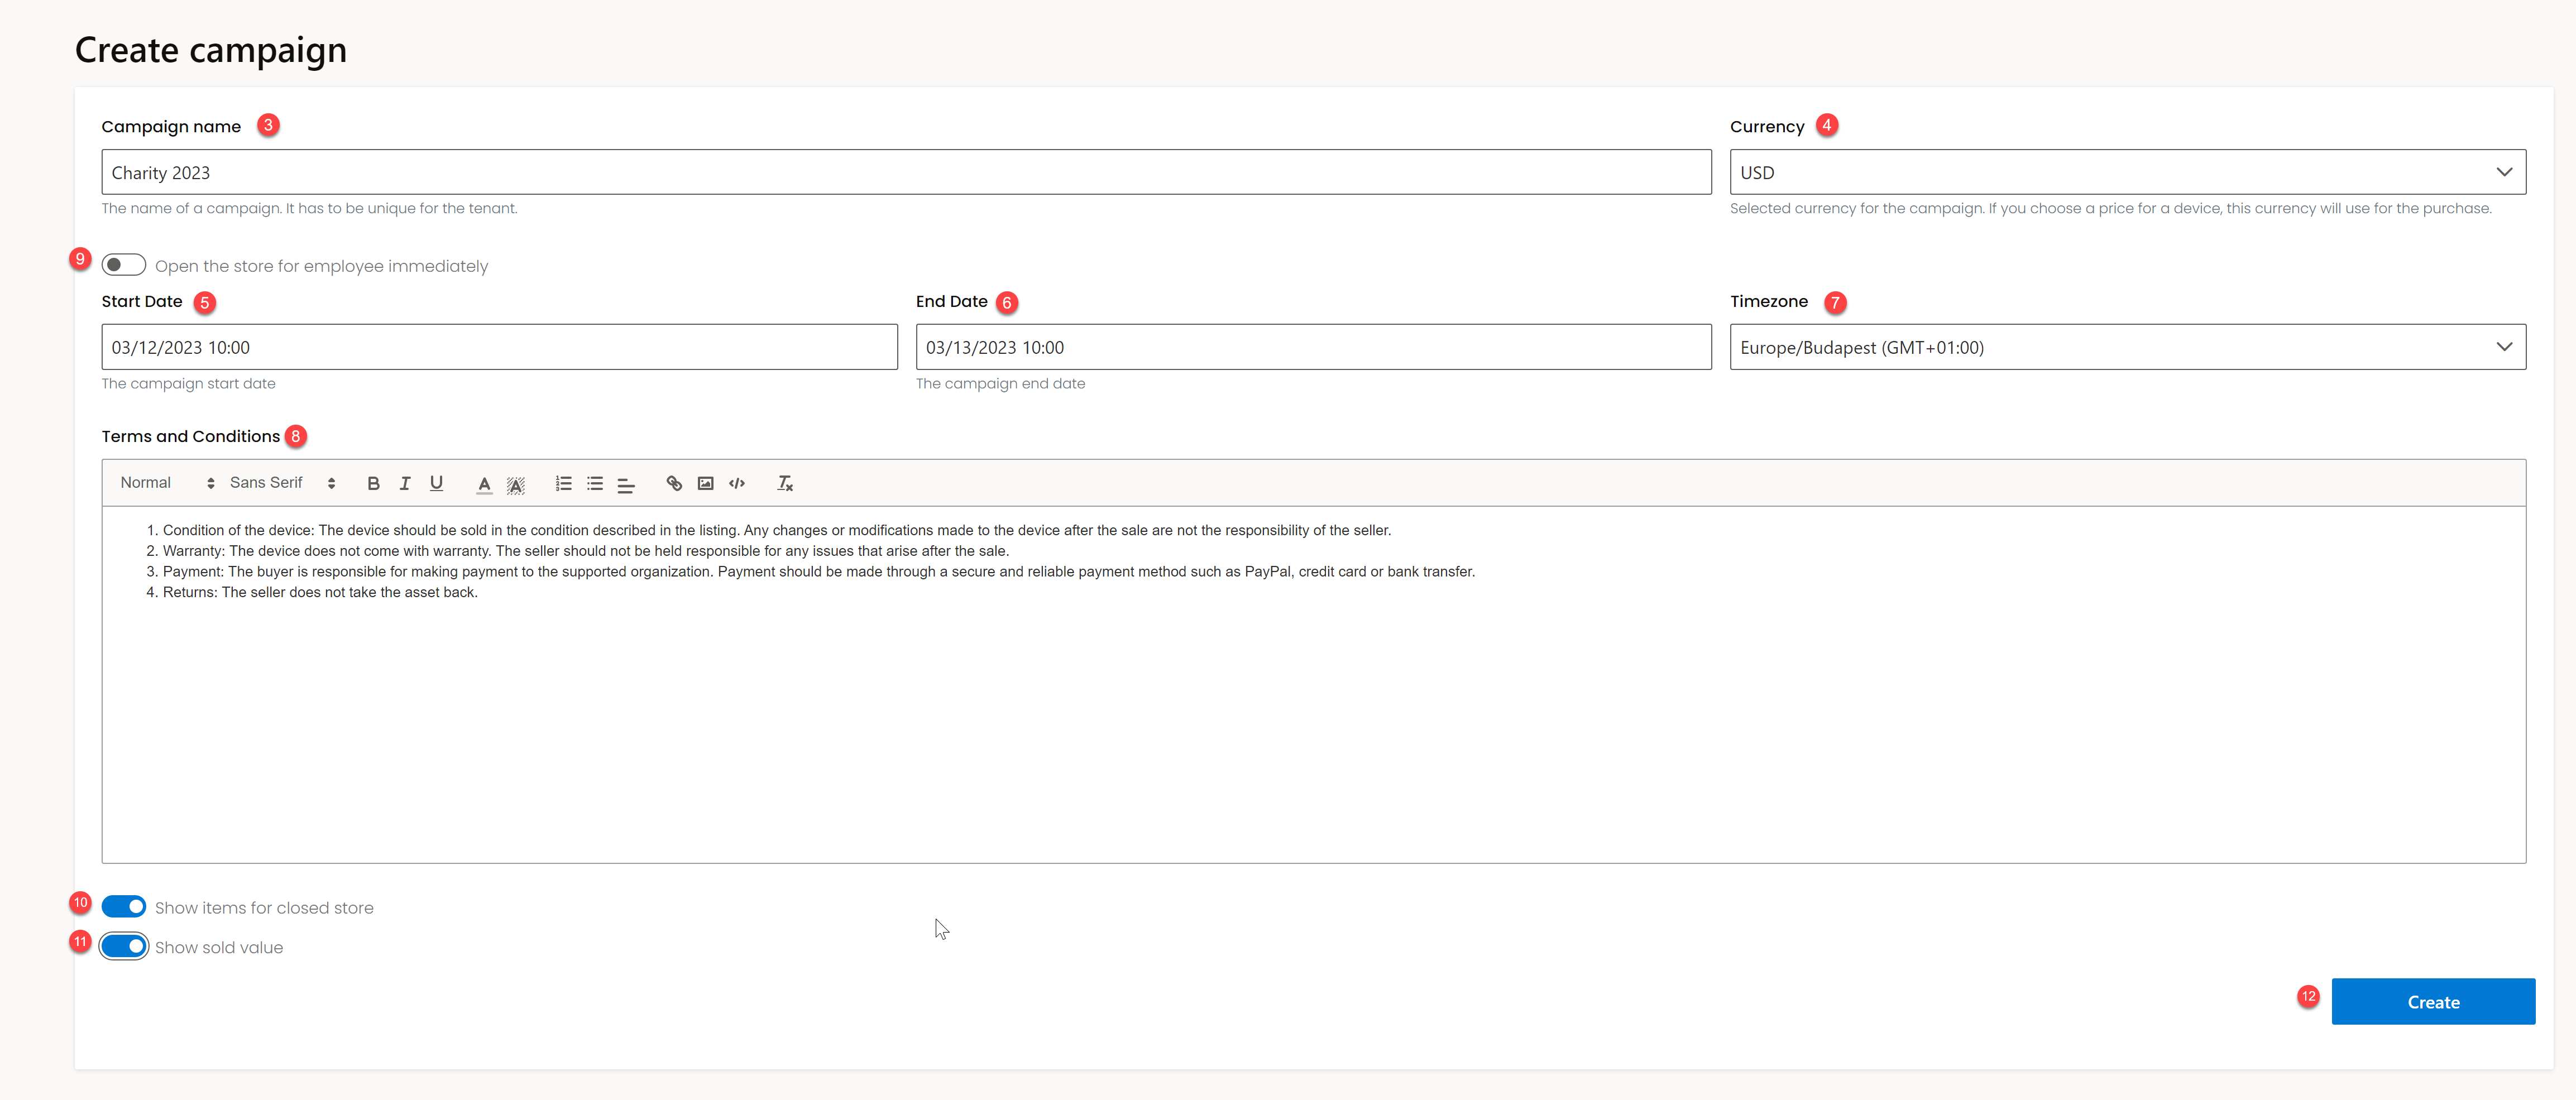
Click the + Create campaign button.
-
Provide a name for the campaign.
-
Select the currency for pricing from the dropdown.
-
Set the start date and time for when the store will open.
-
Set the end date and time for when the store will close.
-
Select the timezone for the campaign schedule.
-
Write the terms and conditions for the campaign (images are not supported).
-
Toggle Open store immediately to make the store available to employees right after creation.
-
Toggle Show items for closed store to control whether devices are visible before the store officially opens.
-
Toggle Show sold value to allow employees to see the total value of sales during the campaign.
-
Click Create to save the campaign.
Add Devices to a Campaign
-
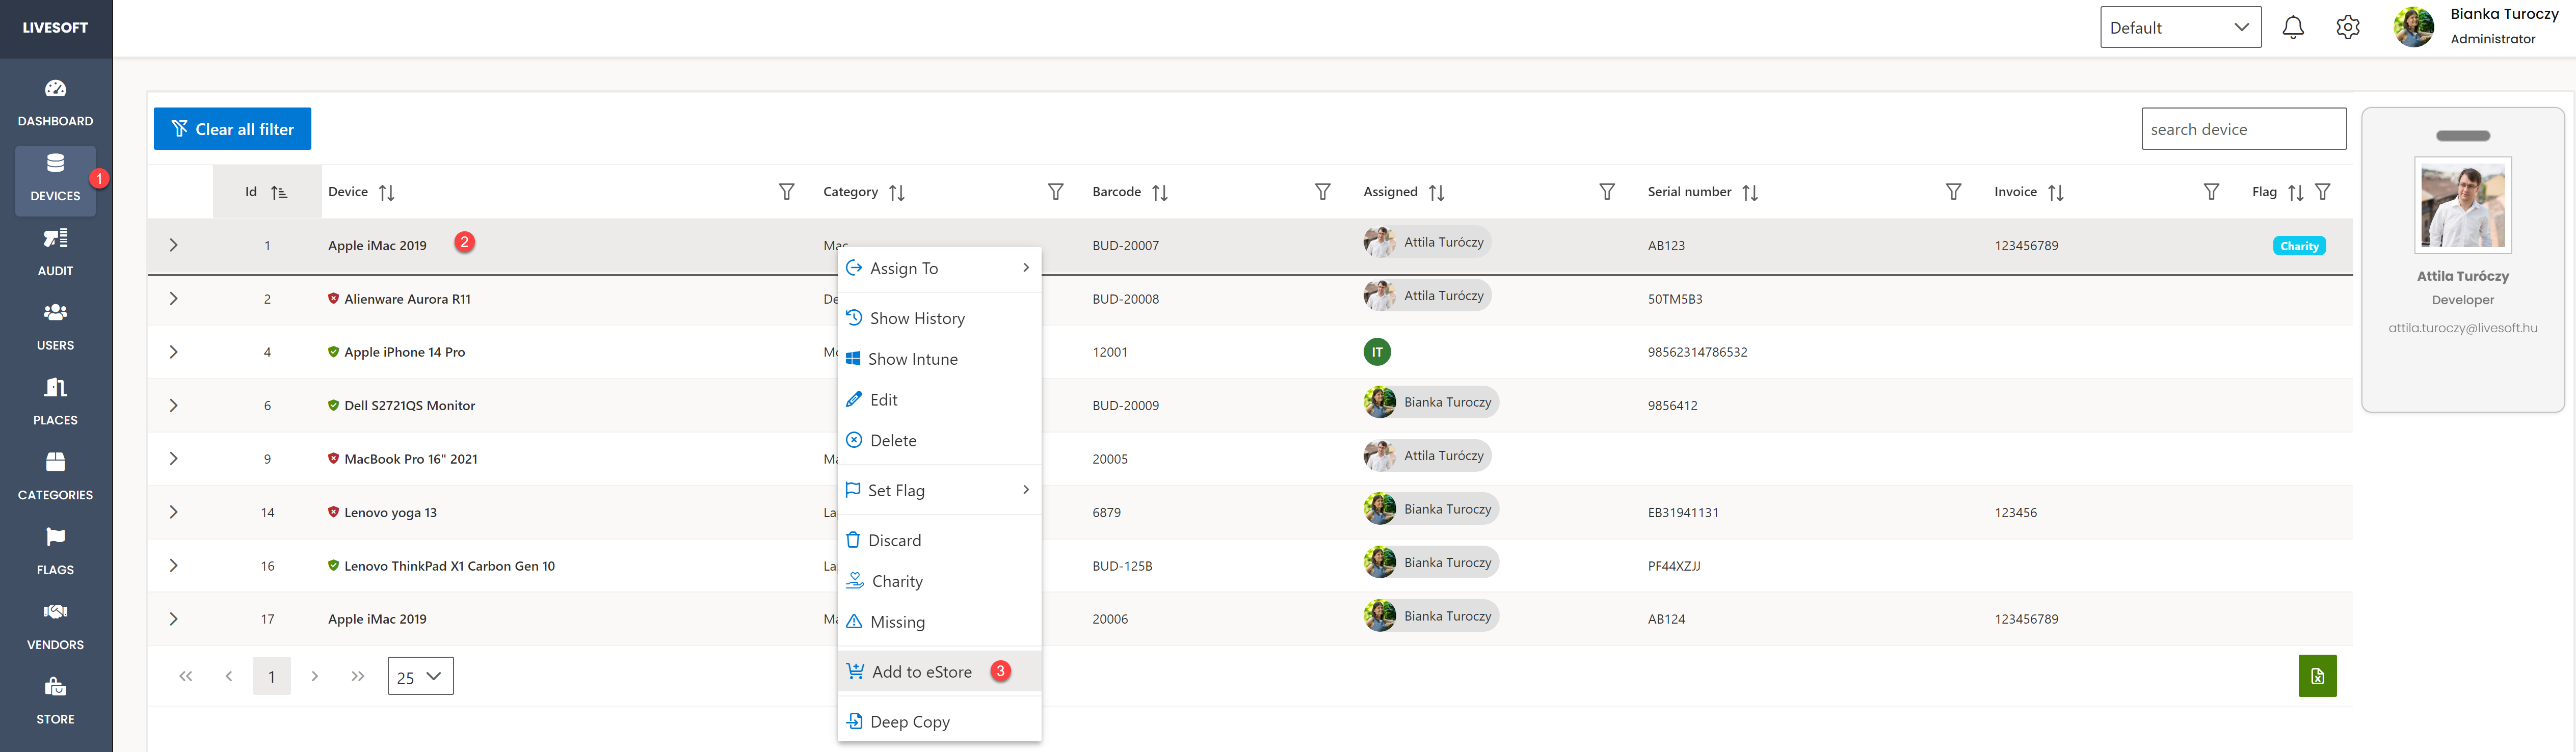
Go to the Devices page.
-
Right-click on the device you want to add.
-
Select Add to eStore (this option appears only after a campaign has been created).
-
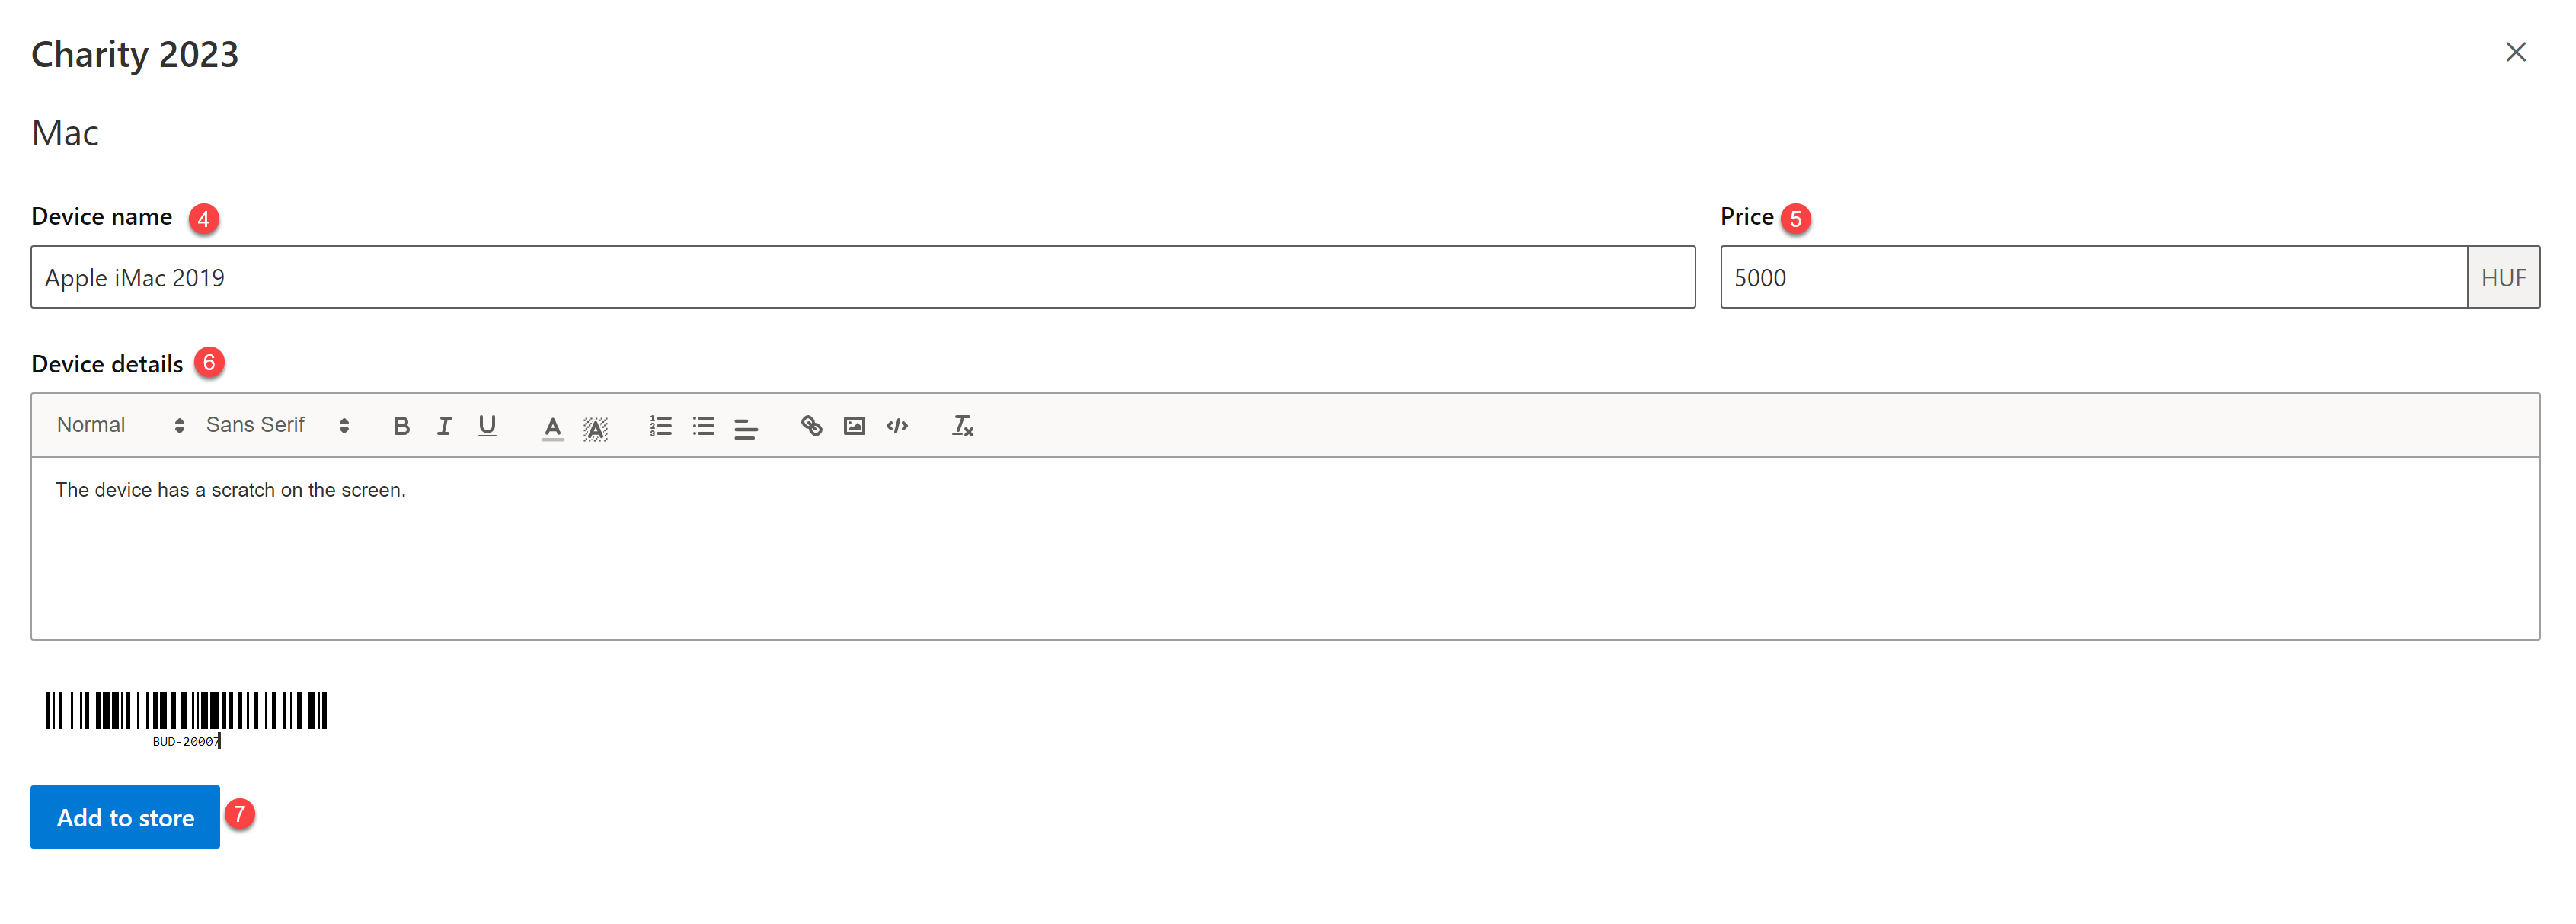
Enter the device name and set the price.
-
Add any additional information in the Device Details section.
-
Click Add to Store to confirm.
The device will appear with the Store assignment on the Devices page and will be listed in the campaign store.

Campaign Management
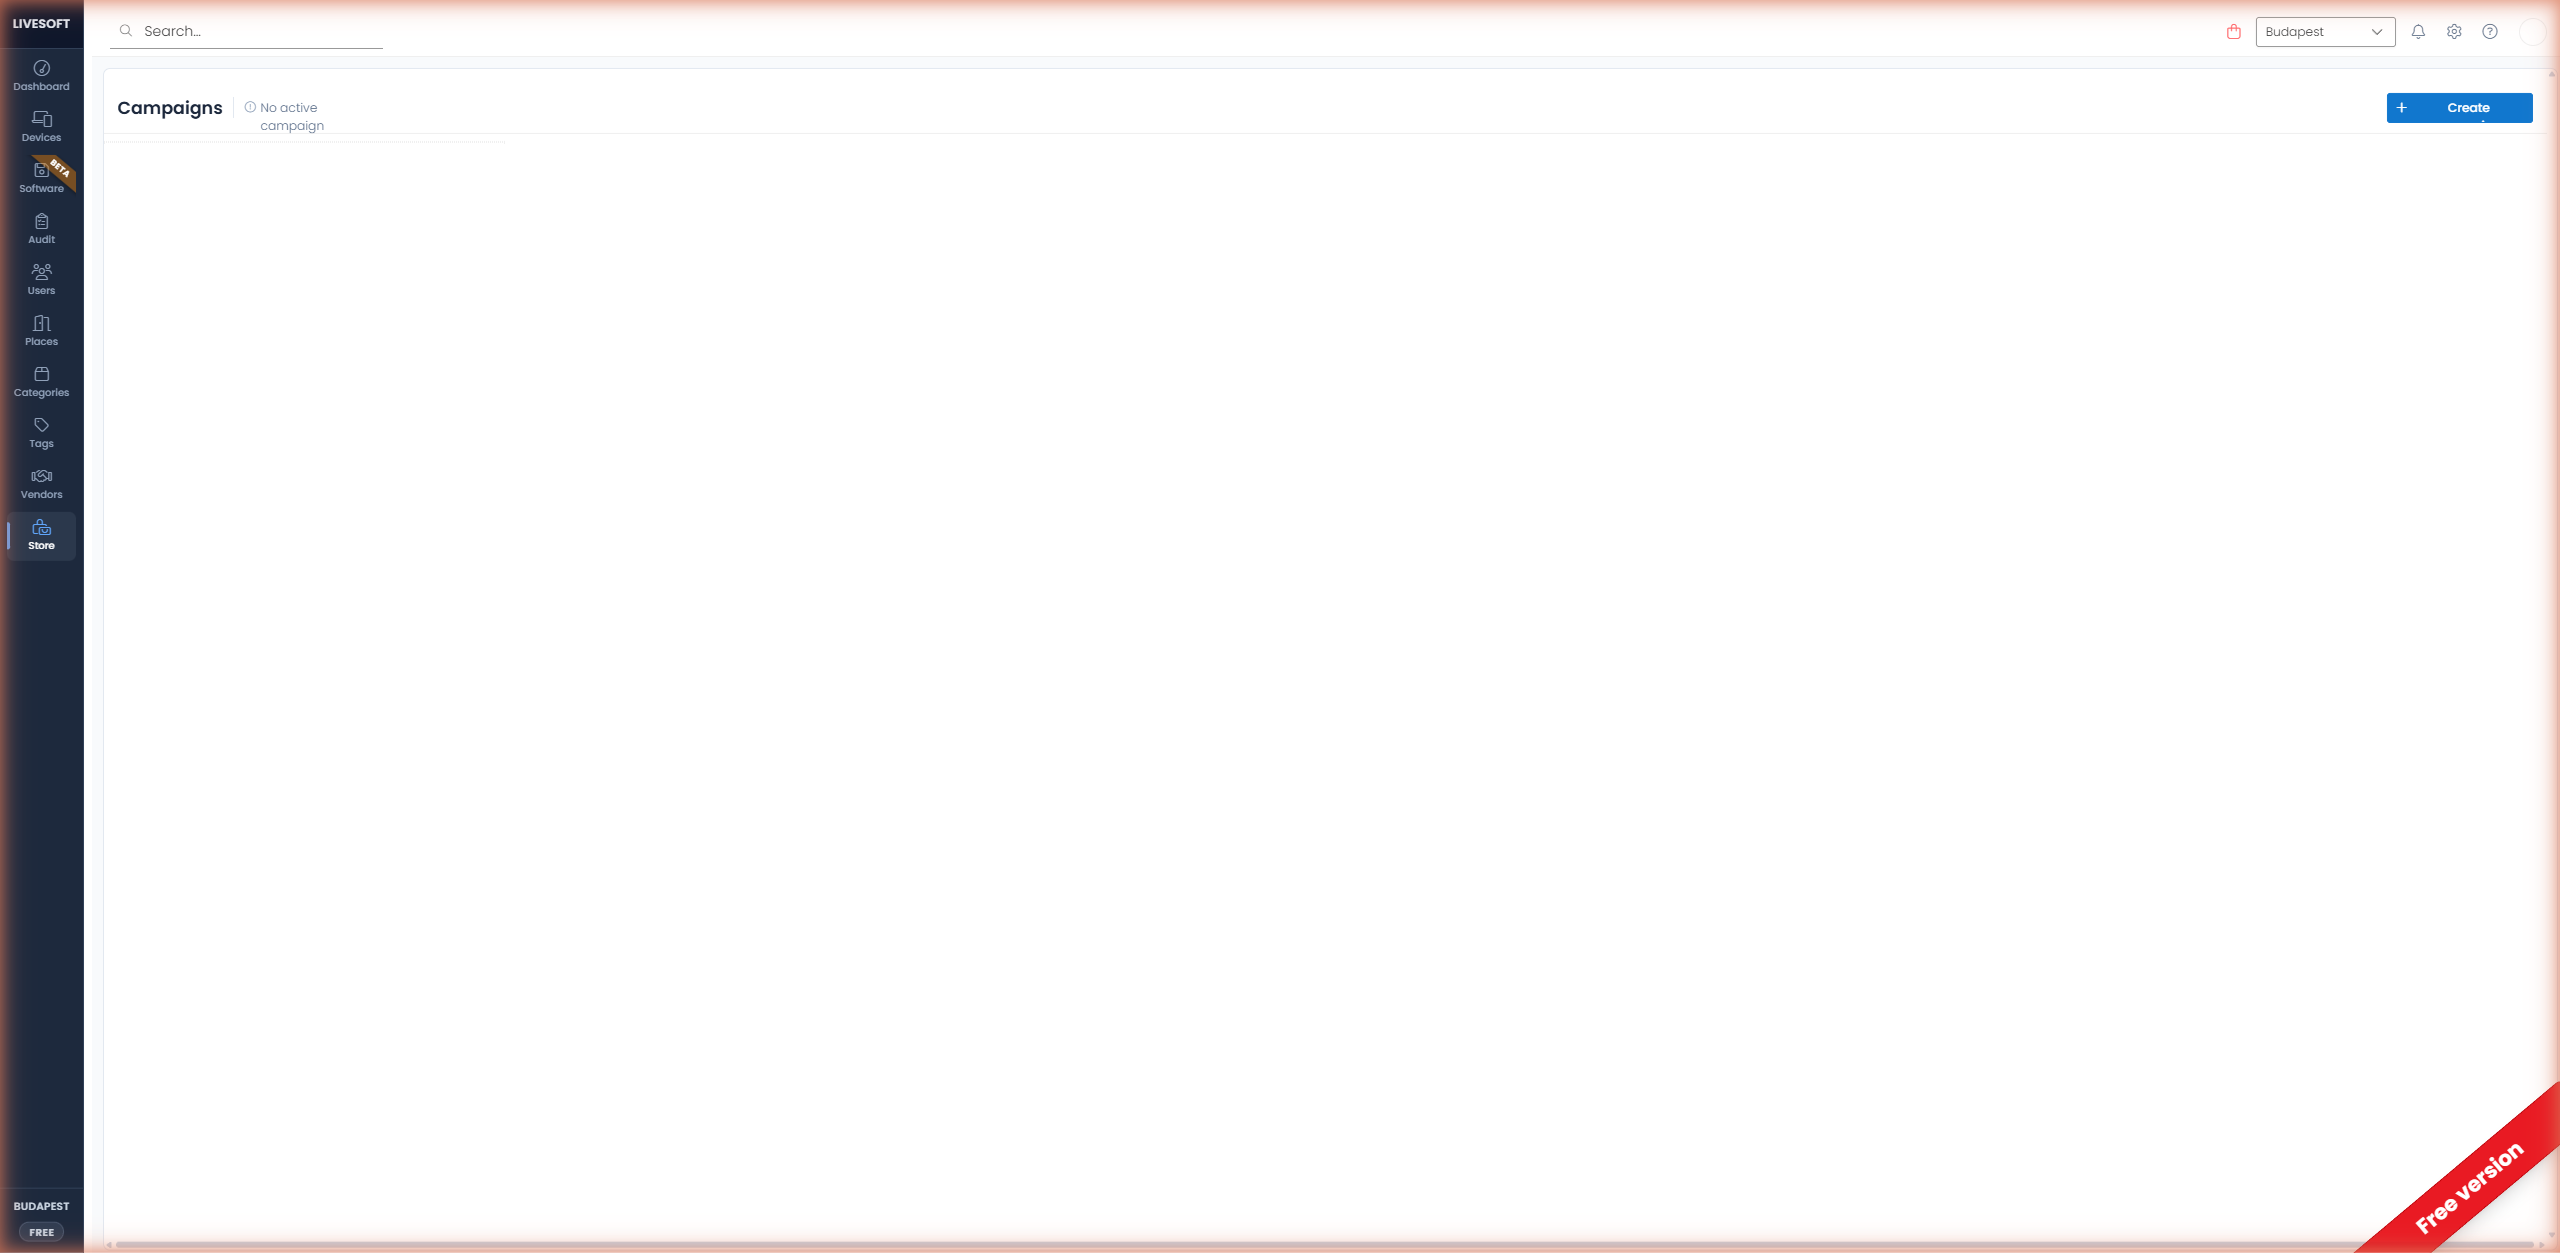
Once created, the campaign appears as a tile on the Campaigns page. Click on it to view and manage details.
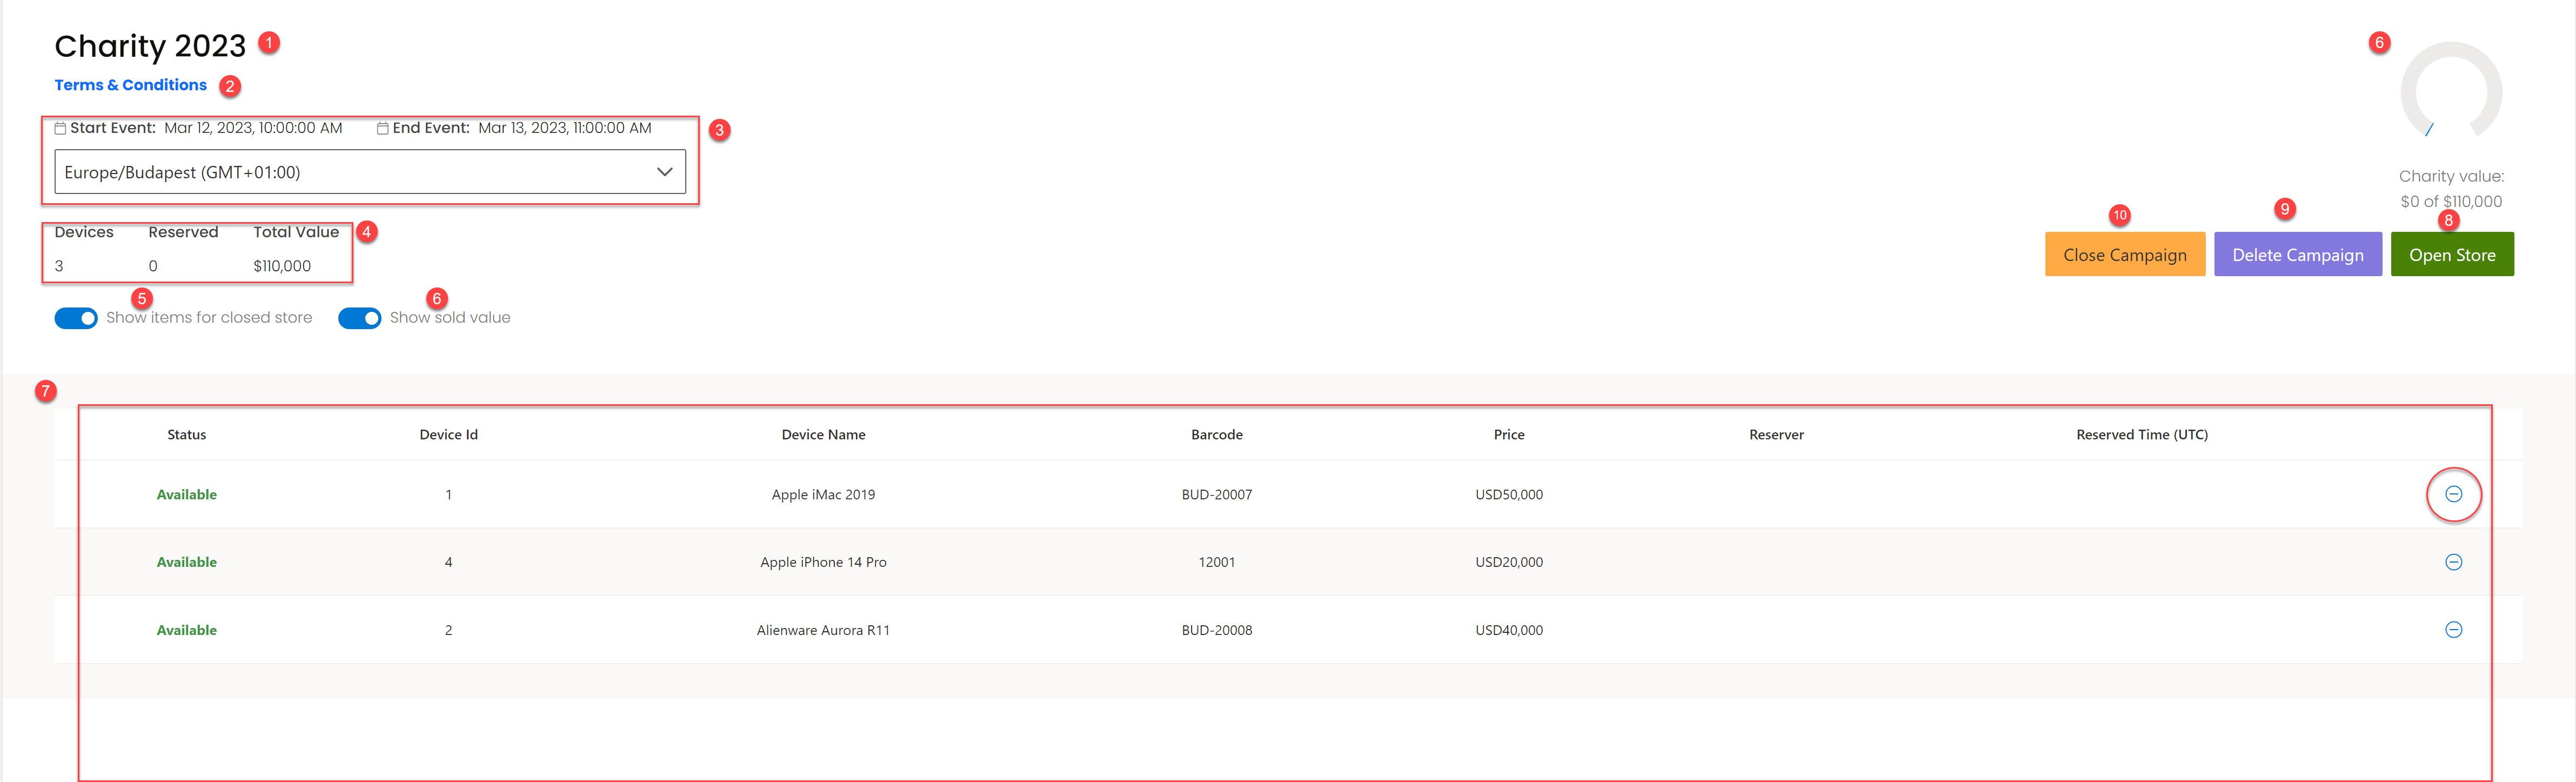
From the campaign detail view, you can:
- Edit the campaign name.
- Update the terms and conditions.
- Modify the start and end dates.
- View the count of devices added, reserved devices, and total charity value.
- Toggle Show items for closed store visibility.
- Toggle Show sold value for employees.
- Review the device table with status, ID, name, barcode, price, reservation date, and reserver. Use the minus icon to remove a device from the store.
- Open or close the store manually at any time.
- Delete the campaign (only when all devices have been removed).
- Close the campaign permanently (no further modifications allowed).
The Employee Store
Employees access the store at: https://thestorage.app/TENANT_NAME/my/store
Share this URL with your employees so they can participate when the store is open.
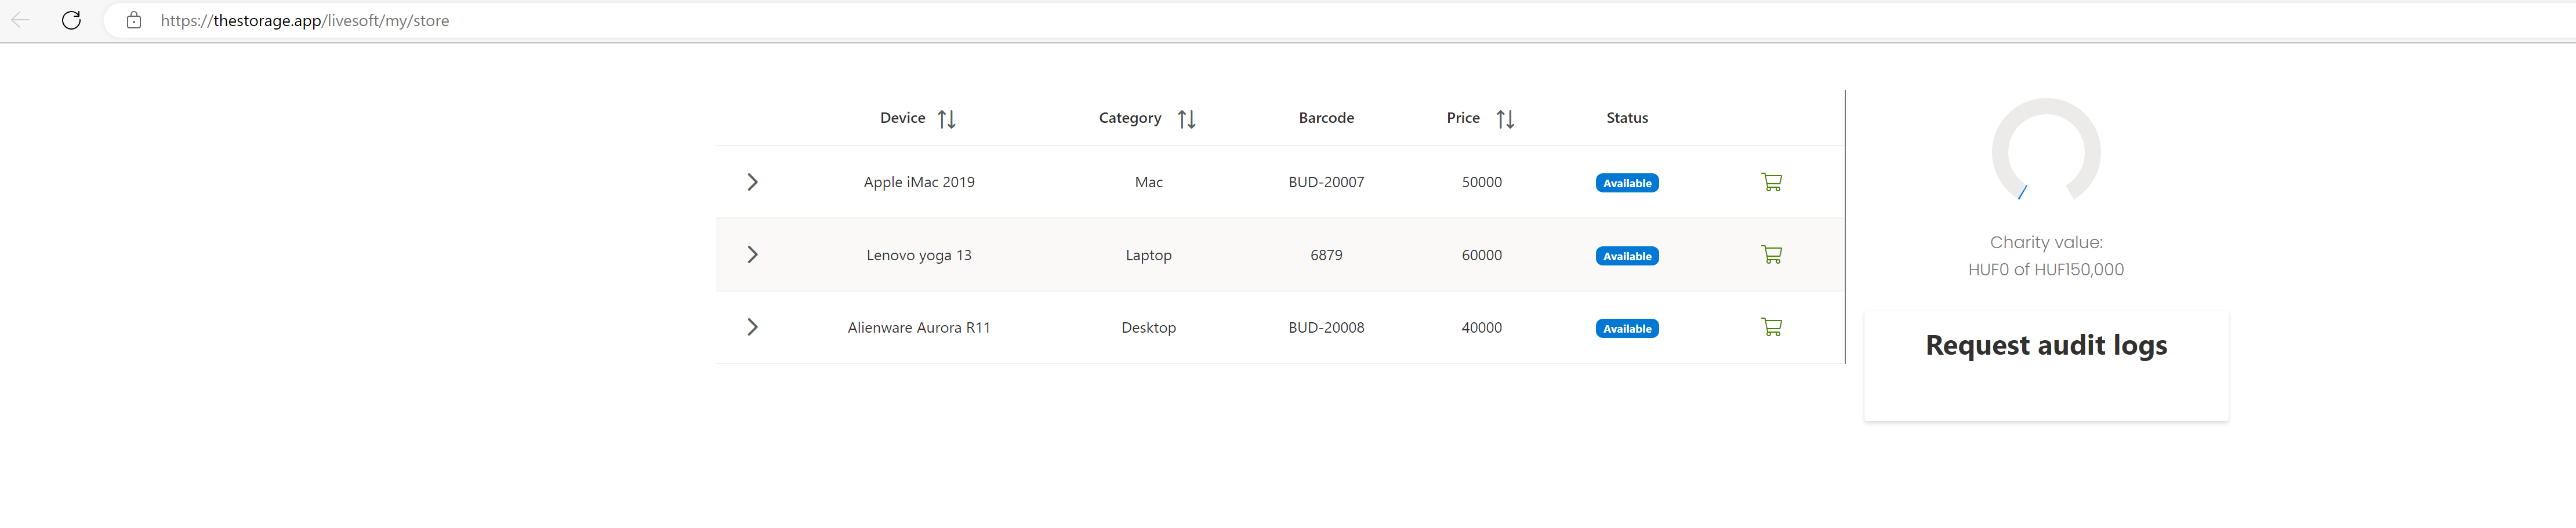
- Employees can browse all listed devices with their name, category, barcode, price, and availability status.
- When the store is open, a shopping cart icon appears next to available devices for reservation.
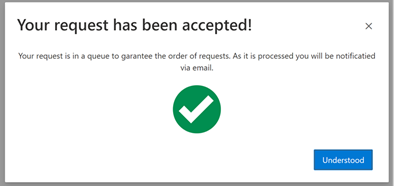
- A confirmation dialog is shown before completing the reservation.

- Reservations can only be withdrawn by an administrator from the campaign management page.

- Reserving a device does not guarantee purchase — it depends on the order of reservations. A confirmation email will be sent regarding the purchase outcome.
- If enabled, the charity value total is visible on the right side of the store page.