Warranty Management
Track warranty expiration dates for your devices. TheStorage provides visual indicators to help you quickly identify which devices are still covered.
Add Warranty to a Device
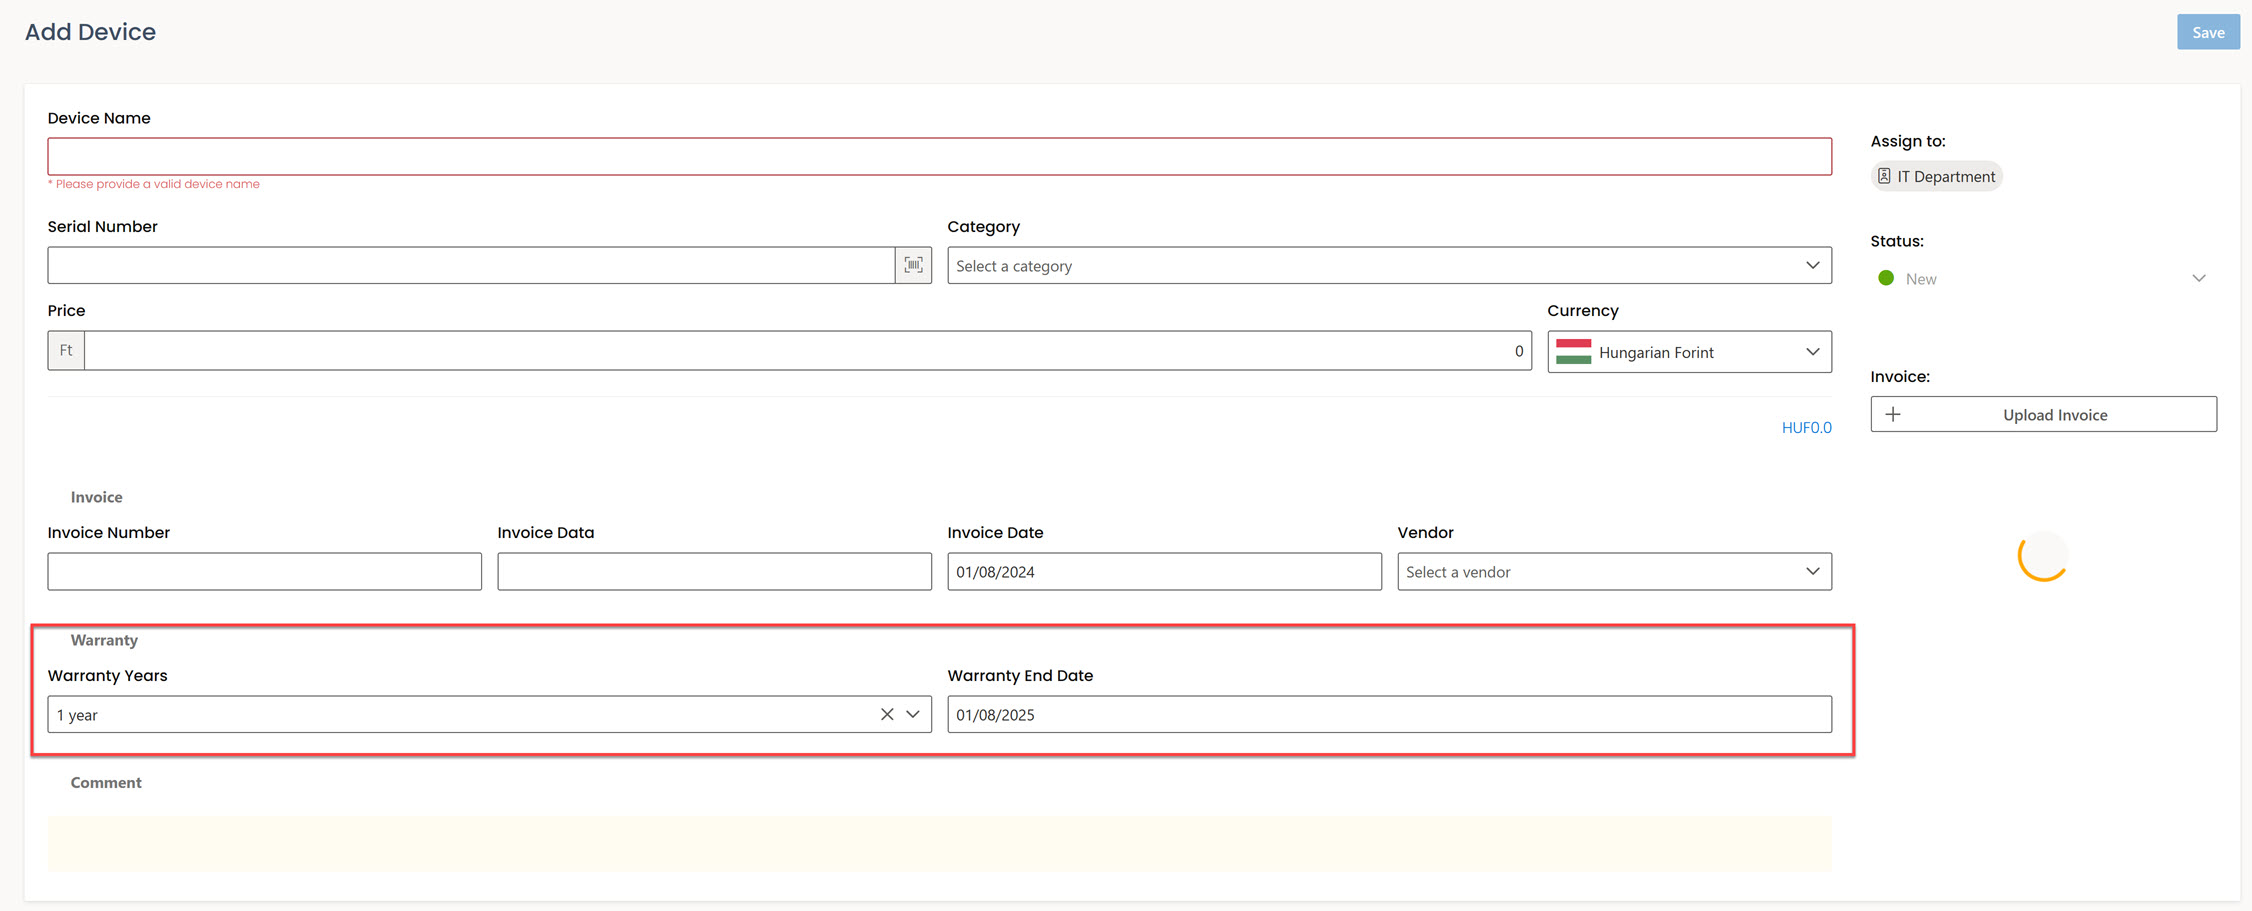
New Device
- Go to the Devices page and click + Add Device.
- Fill in the device details as required.
- In the Warranty section, configure:
- Warranty years — Select from 1, 2, 3, 4, 5, or 10 years, or indicate no warranty.
- Warranty end date — Select the exact expiration date using the date picker.
- Click Save.
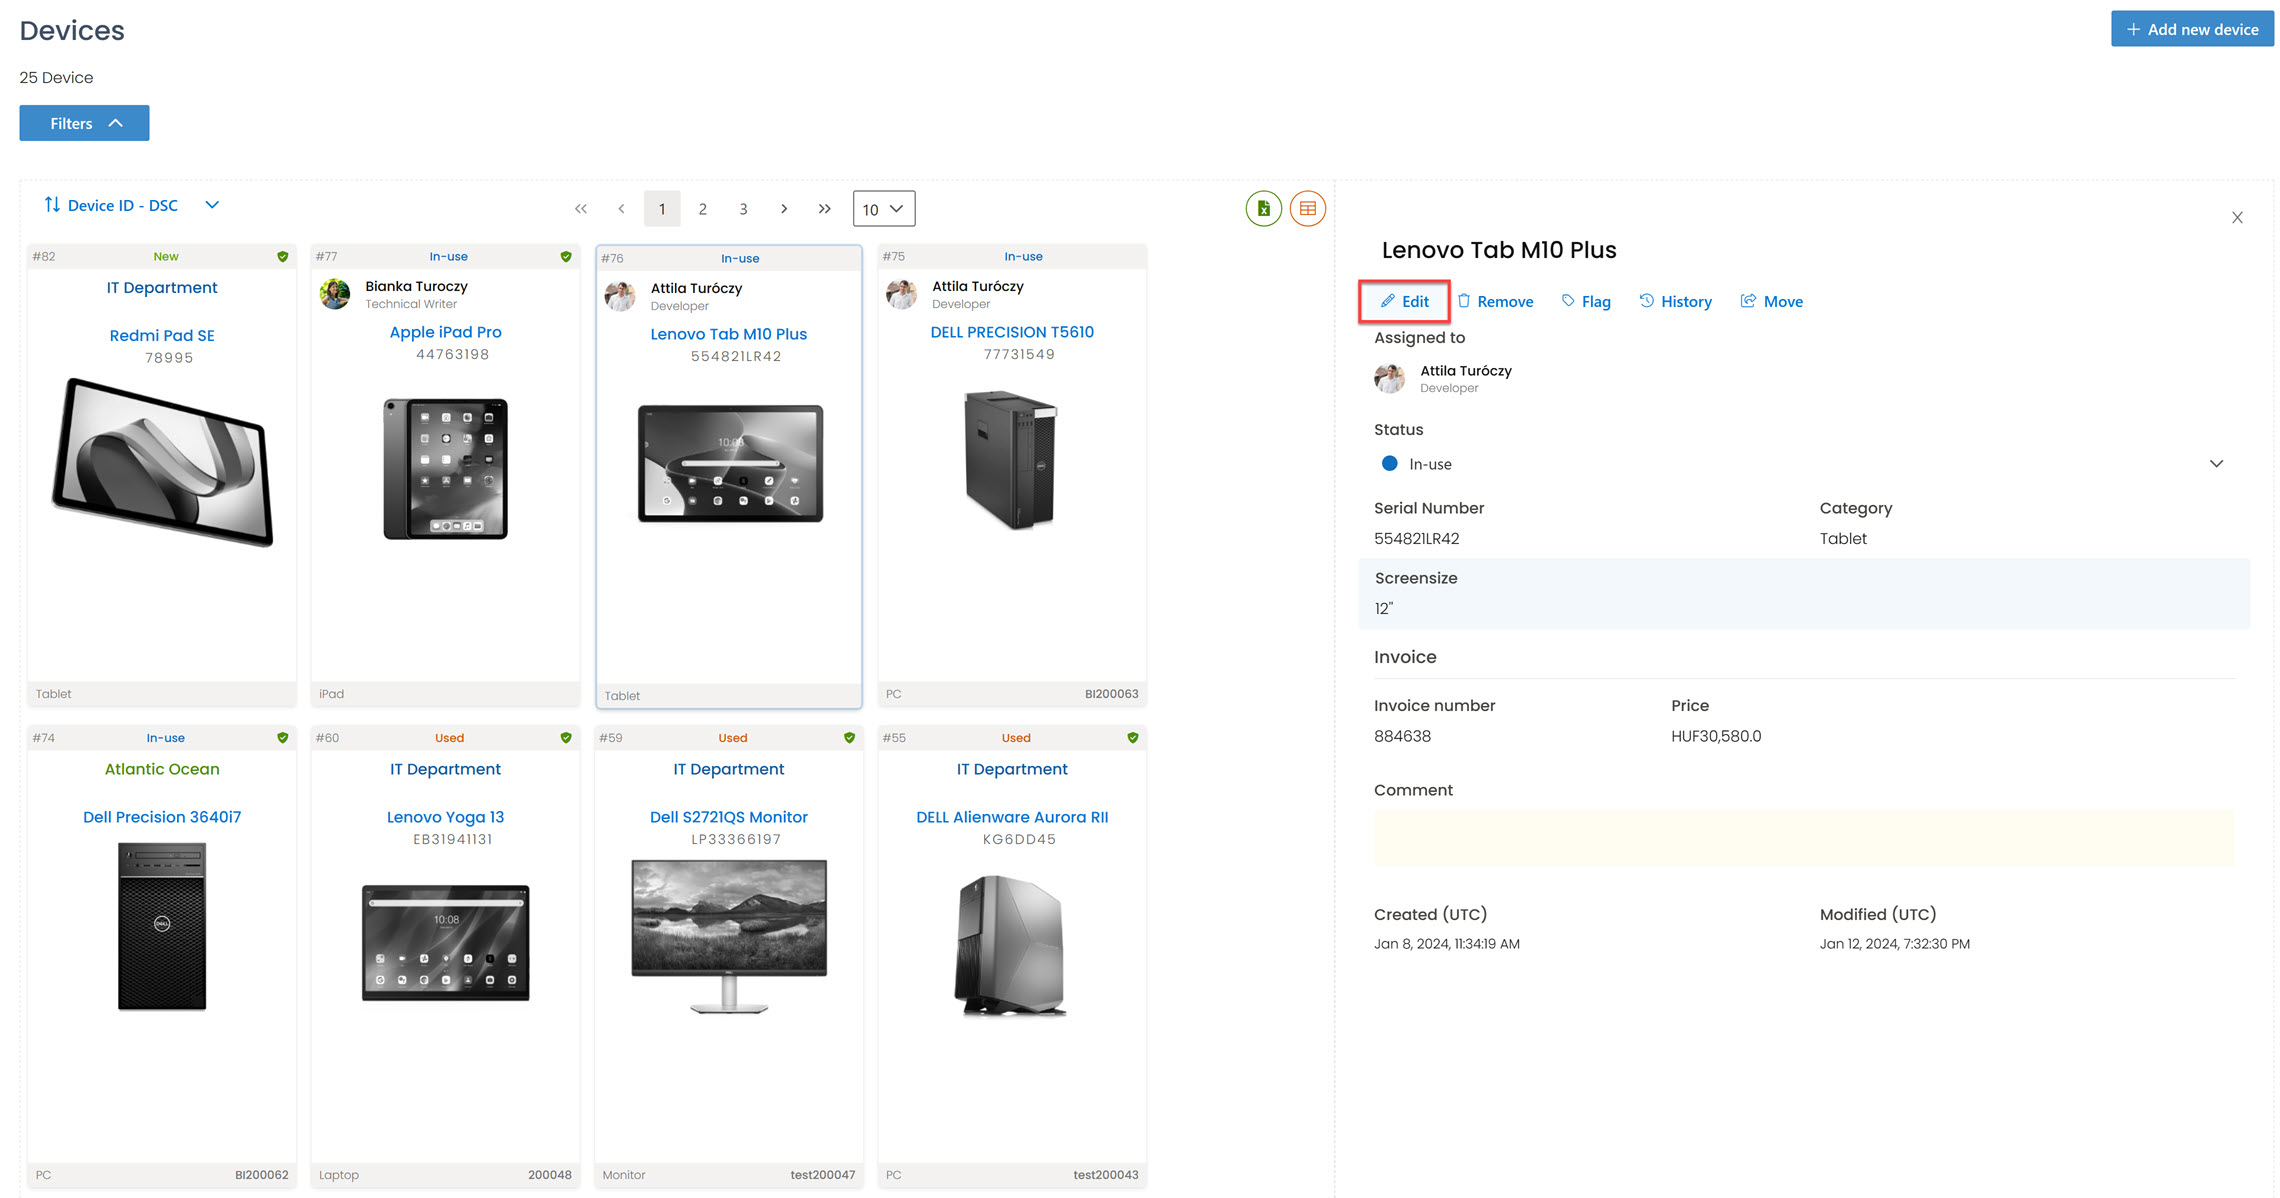
Existing Device
- Go to the Devices page and click on the device.
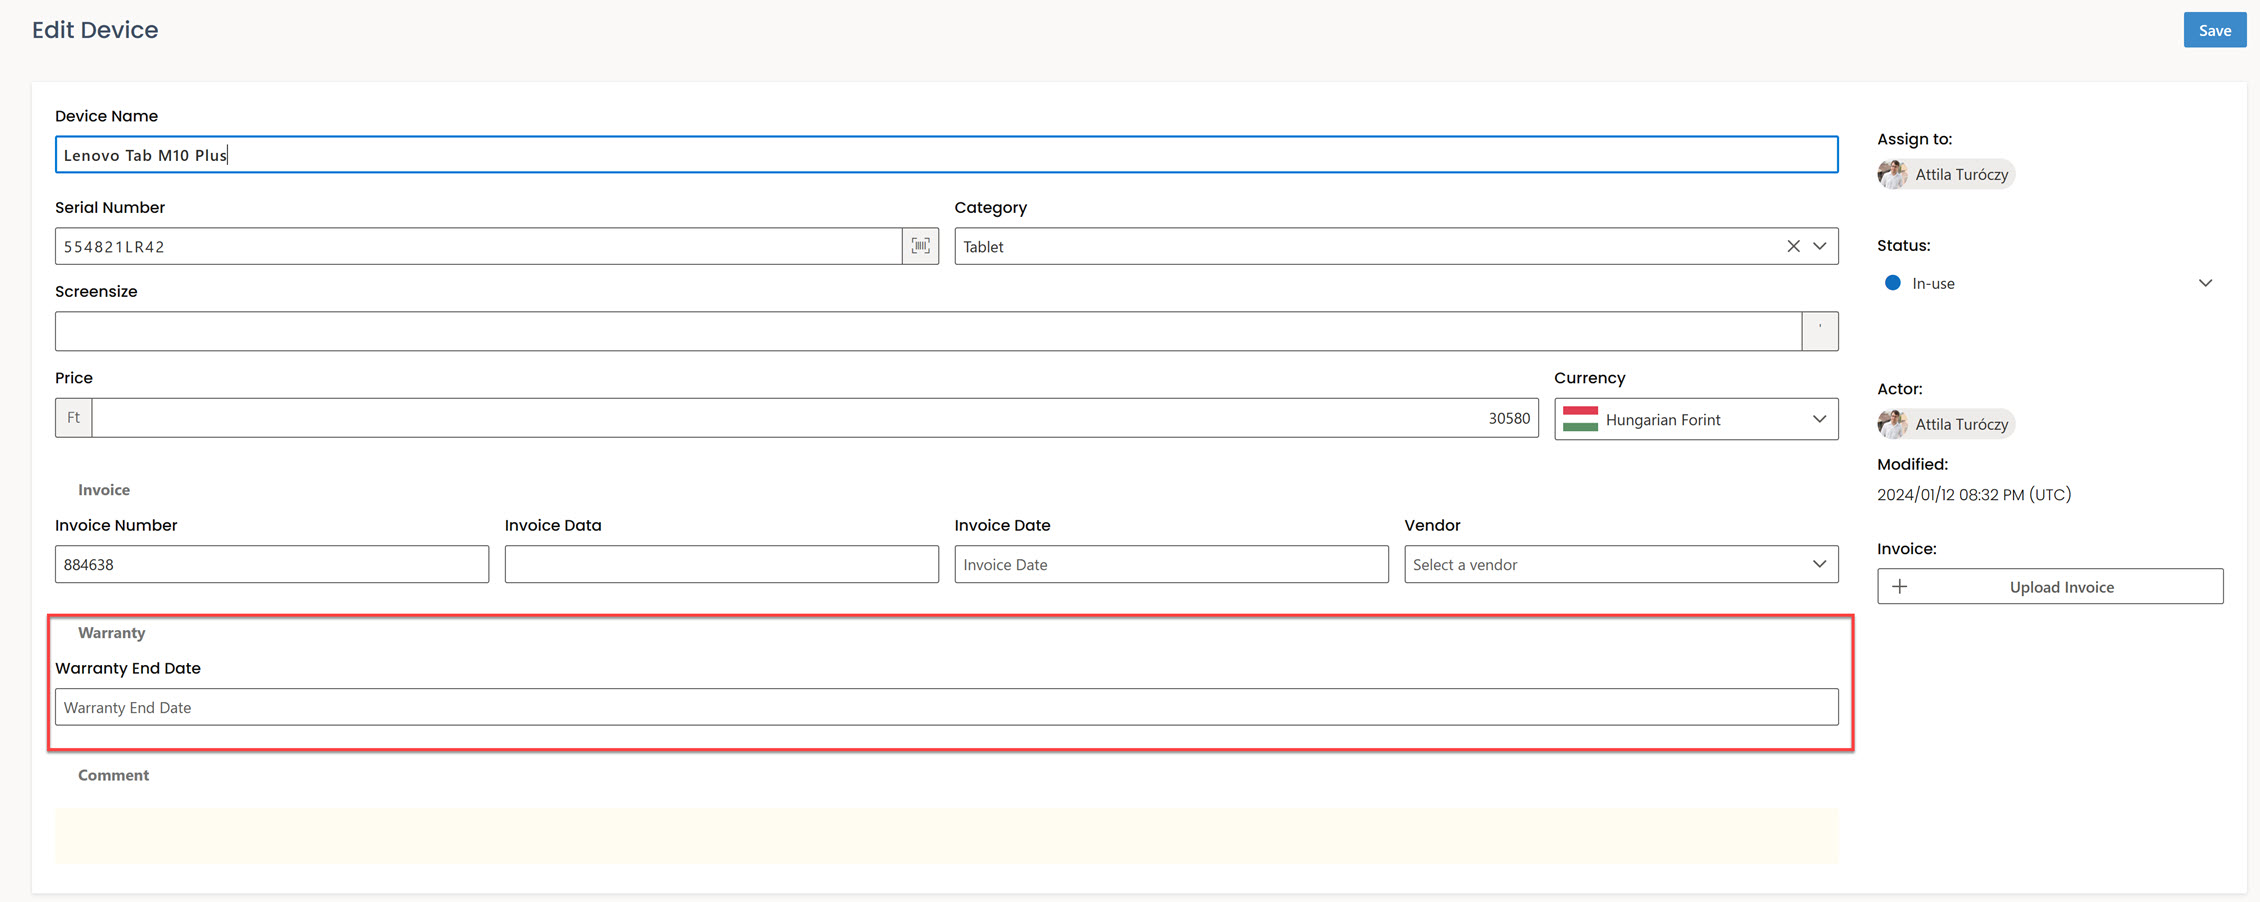
- Click Edit in the information panel on the right side.
- Update the Warranty end date in the Warranty section.
- Click Save.
Warranty Indicators
Warranty status is displayed across all device views:
| Icon | Meaning |
|---|---|
| Green shield | Device is currently under warranty |
| Red shield | Warranty has expired |
| No icon | No warranty date has been added |
Warranty icons appear:
- Card view — Top-right corner of the device tile.
- List view — Before the device name.
- Information panel — Next to the device name.