Assign or Remove a Tag
Tags are applied directly from the device's information panel — no dedicated page visit required. A single device can carry multiple tags at once (for example, Development + Loaner).
Prerequisite
You need at least one tag in the Tags page. See Create a New Tag if you haven't created one yet.
Assign one or more tags
-
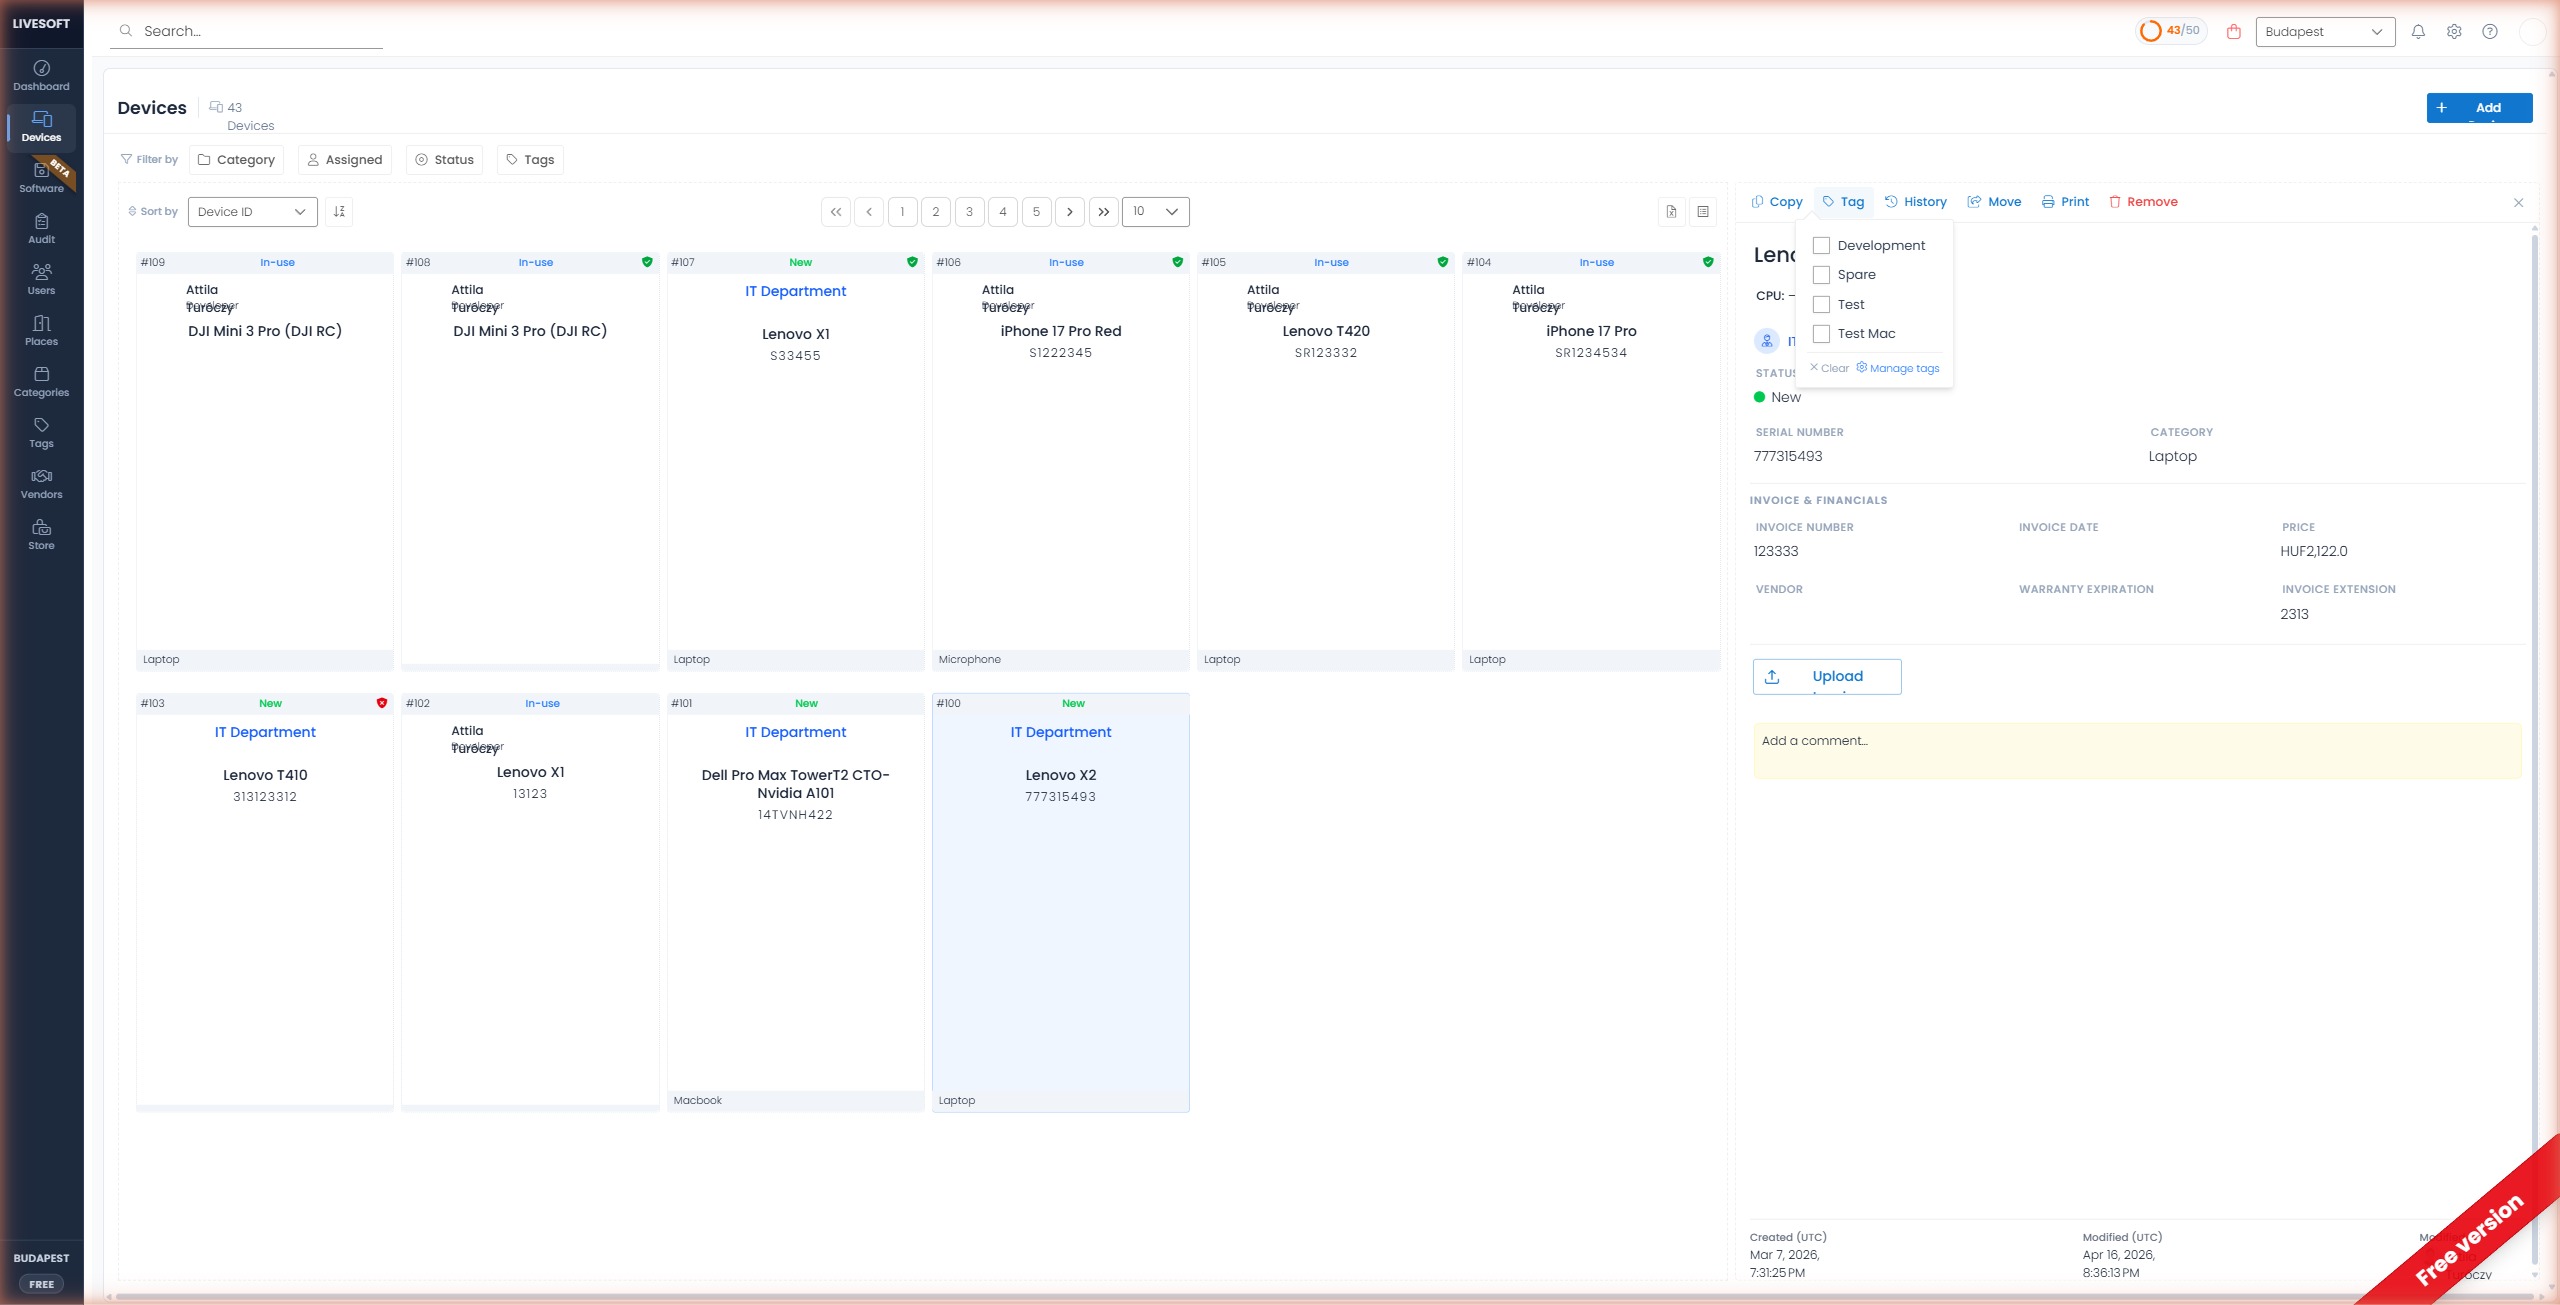
Navigate to Devices and click on the device you want to tag.
-
In the top action bar of the information panel, click Tag.
-
A checkbox dropdown opens with all tags in the tenant.
-
Tick the boxes next to the tags you want on this device.
-
Close the dropdown — changes are saved automatically.
Dropdown shortcuts
| Control | Behavior |
|---|---|
| × Clear | Removes every tag from the device in one click. |
| ⚙ Manage tags | Jumps to the Tags page so you can create or edit tags without losing your place. |
Where tags are displayed
Once assigned, tags appear wherever the device is shown:
| Location | Display |
|---|---|
| Card view | Small colored chips at the bottom-right of the tile |
| List view | Colored chips in the Tag column |
| Information panel | Chips just below the device name |
| Tags filter chip | The tag becomes selectable for filtering |
| Dashboard | The Tags summary at the bottom of the Dashboard shows a count per tag |
Remove a tag from a device
You have two ways to remove a tag:
- Uncheck it in the Tag dropdown — the chip disappears from the device.
- Click the X on the tag chip directly in the information panel.
To remove all tags at once, use the × Clear shortcut at the bottom of the Tag dropdown.
Bulk tagging
There is no bulk-assign action in the UI. For large bulk updates (e.g., tag every laptop arrived in April 2026), import the devices with the Tags column pre-populated in the Excel template.