Devices Page Overview
The Devices page is the home for every device in your tenant. It offers two layouts (card and list), quick filters and sorting, and a right-side detail panel that lets you read and edit a single device without leaving the list.
Page Header
The header contains:
- Title --
Deviceswith the total number of devices displayed next to the asset icon (e.g. 43 Devices). - + Add Device -- the blue button in the top-right corner opens the Add Device dialog.
Toolbar
Below the header sits the toolbar, with three zones:
- Filter chips -- Filter by, Category, Assigned, Status, and Tags -- open dropdown filters to narrow the list. See Searching & Filtering.
- Sort controls -- Sort by with a field selector (Device ID, Device Name, Barcode, Creation date, Modified date) plus an ascending/descending toggle. See Ordering.
- Pagination & view toggle -- page navigation (first / prev / numbers / next / last), a page-size selector (10 / 20 / 50), and two view-toggle icons on the far right: Card view and List view.
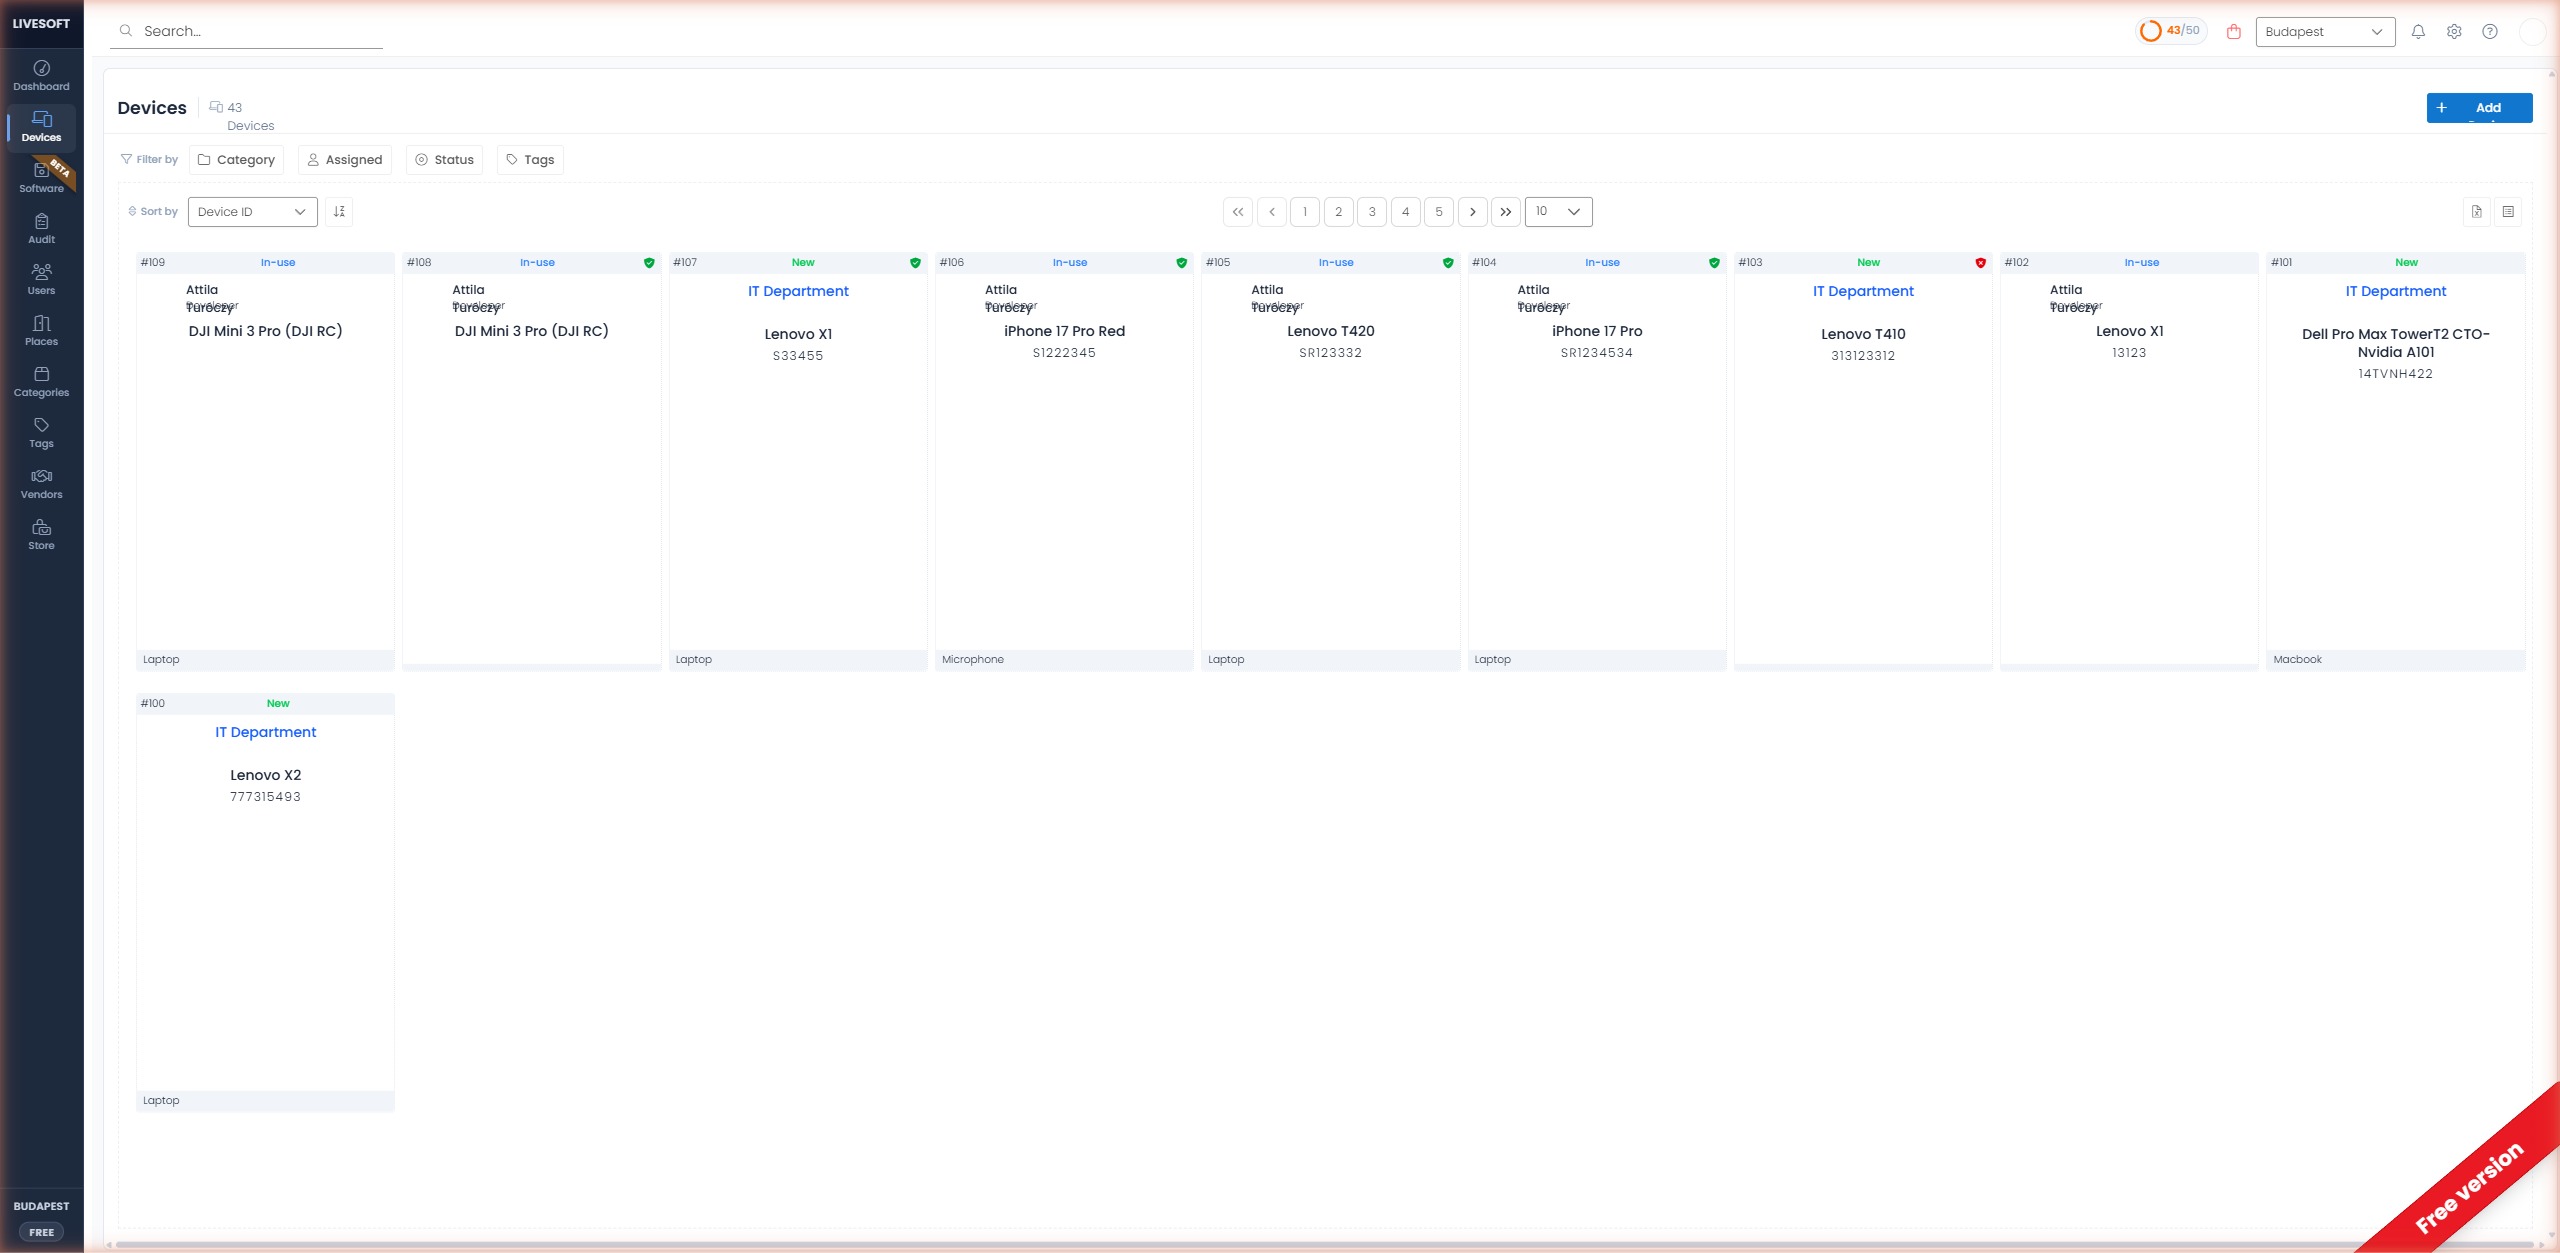
Card View
In Card view, each device is rendered as a tile with the following elements:
| Position | Element |
|---|---|
| Top-left | Device ID (e.g. #108) |
| Top-center | Status badge (color-coded: New, In-use, Used, etc.) |
| Top-right | Warranty shield (green = valid, red = expired) |
| Body (top) | Assigned user (avatar + name + job title) or IT Department |
| Body (center) | Device name and serial number |
| Body (center) | Device image (if uploaded) |
| Footer-left | Category label |
| Footer-right | Barcode (if enabled) |
Clicking a tile opens the information panel on the right-hand side.
List View
List view renders devices in a dense table, useful for scanning many records at once.
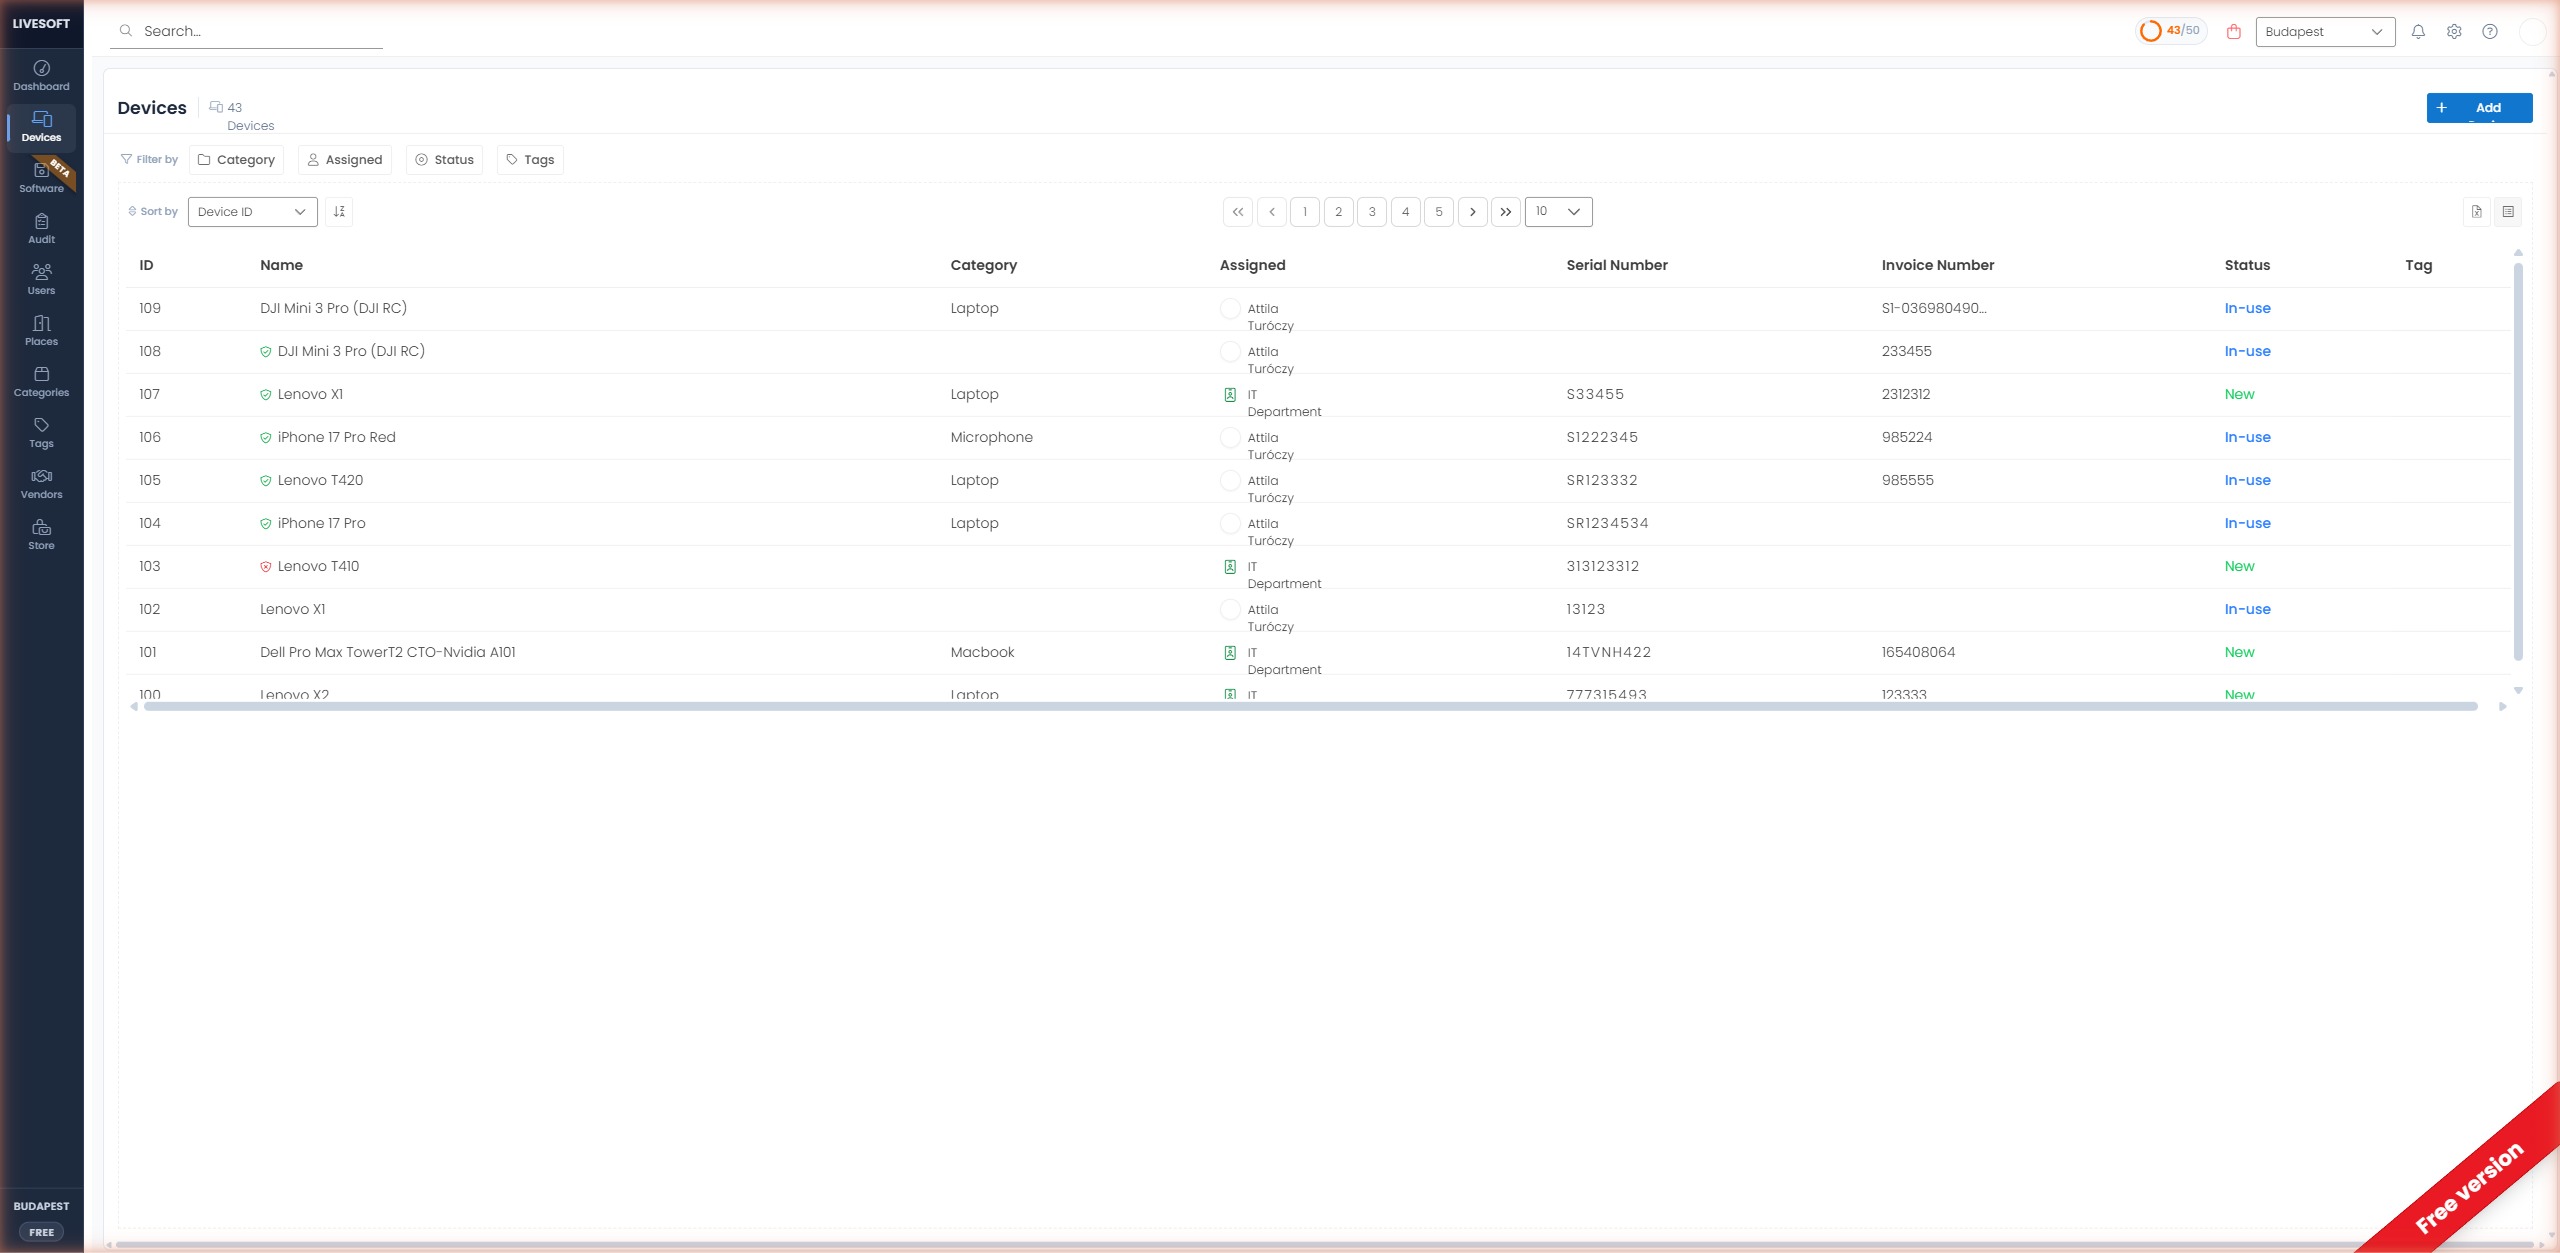
| Column | Description |
|---|---|
| ID | Unique numeric device identifier |
| Name | Device name, prefixed with a warranty shield if warranty data is present |
| Category | Device category |
| Assigned | Assigned user (with avatar) or IT Department |
| Serial Number | Device serial number |
| Invoice Number | Associated invoice number |
| Status | Color-coded status |
| Tag | Assigned tag(s) |
Clicking a row opens the information panel on the right-hand side.
Information Panel
Selecting a device in either view opens a detail panel that slides in from the right. The rest of the list stays visible so you can quickly jump between records.
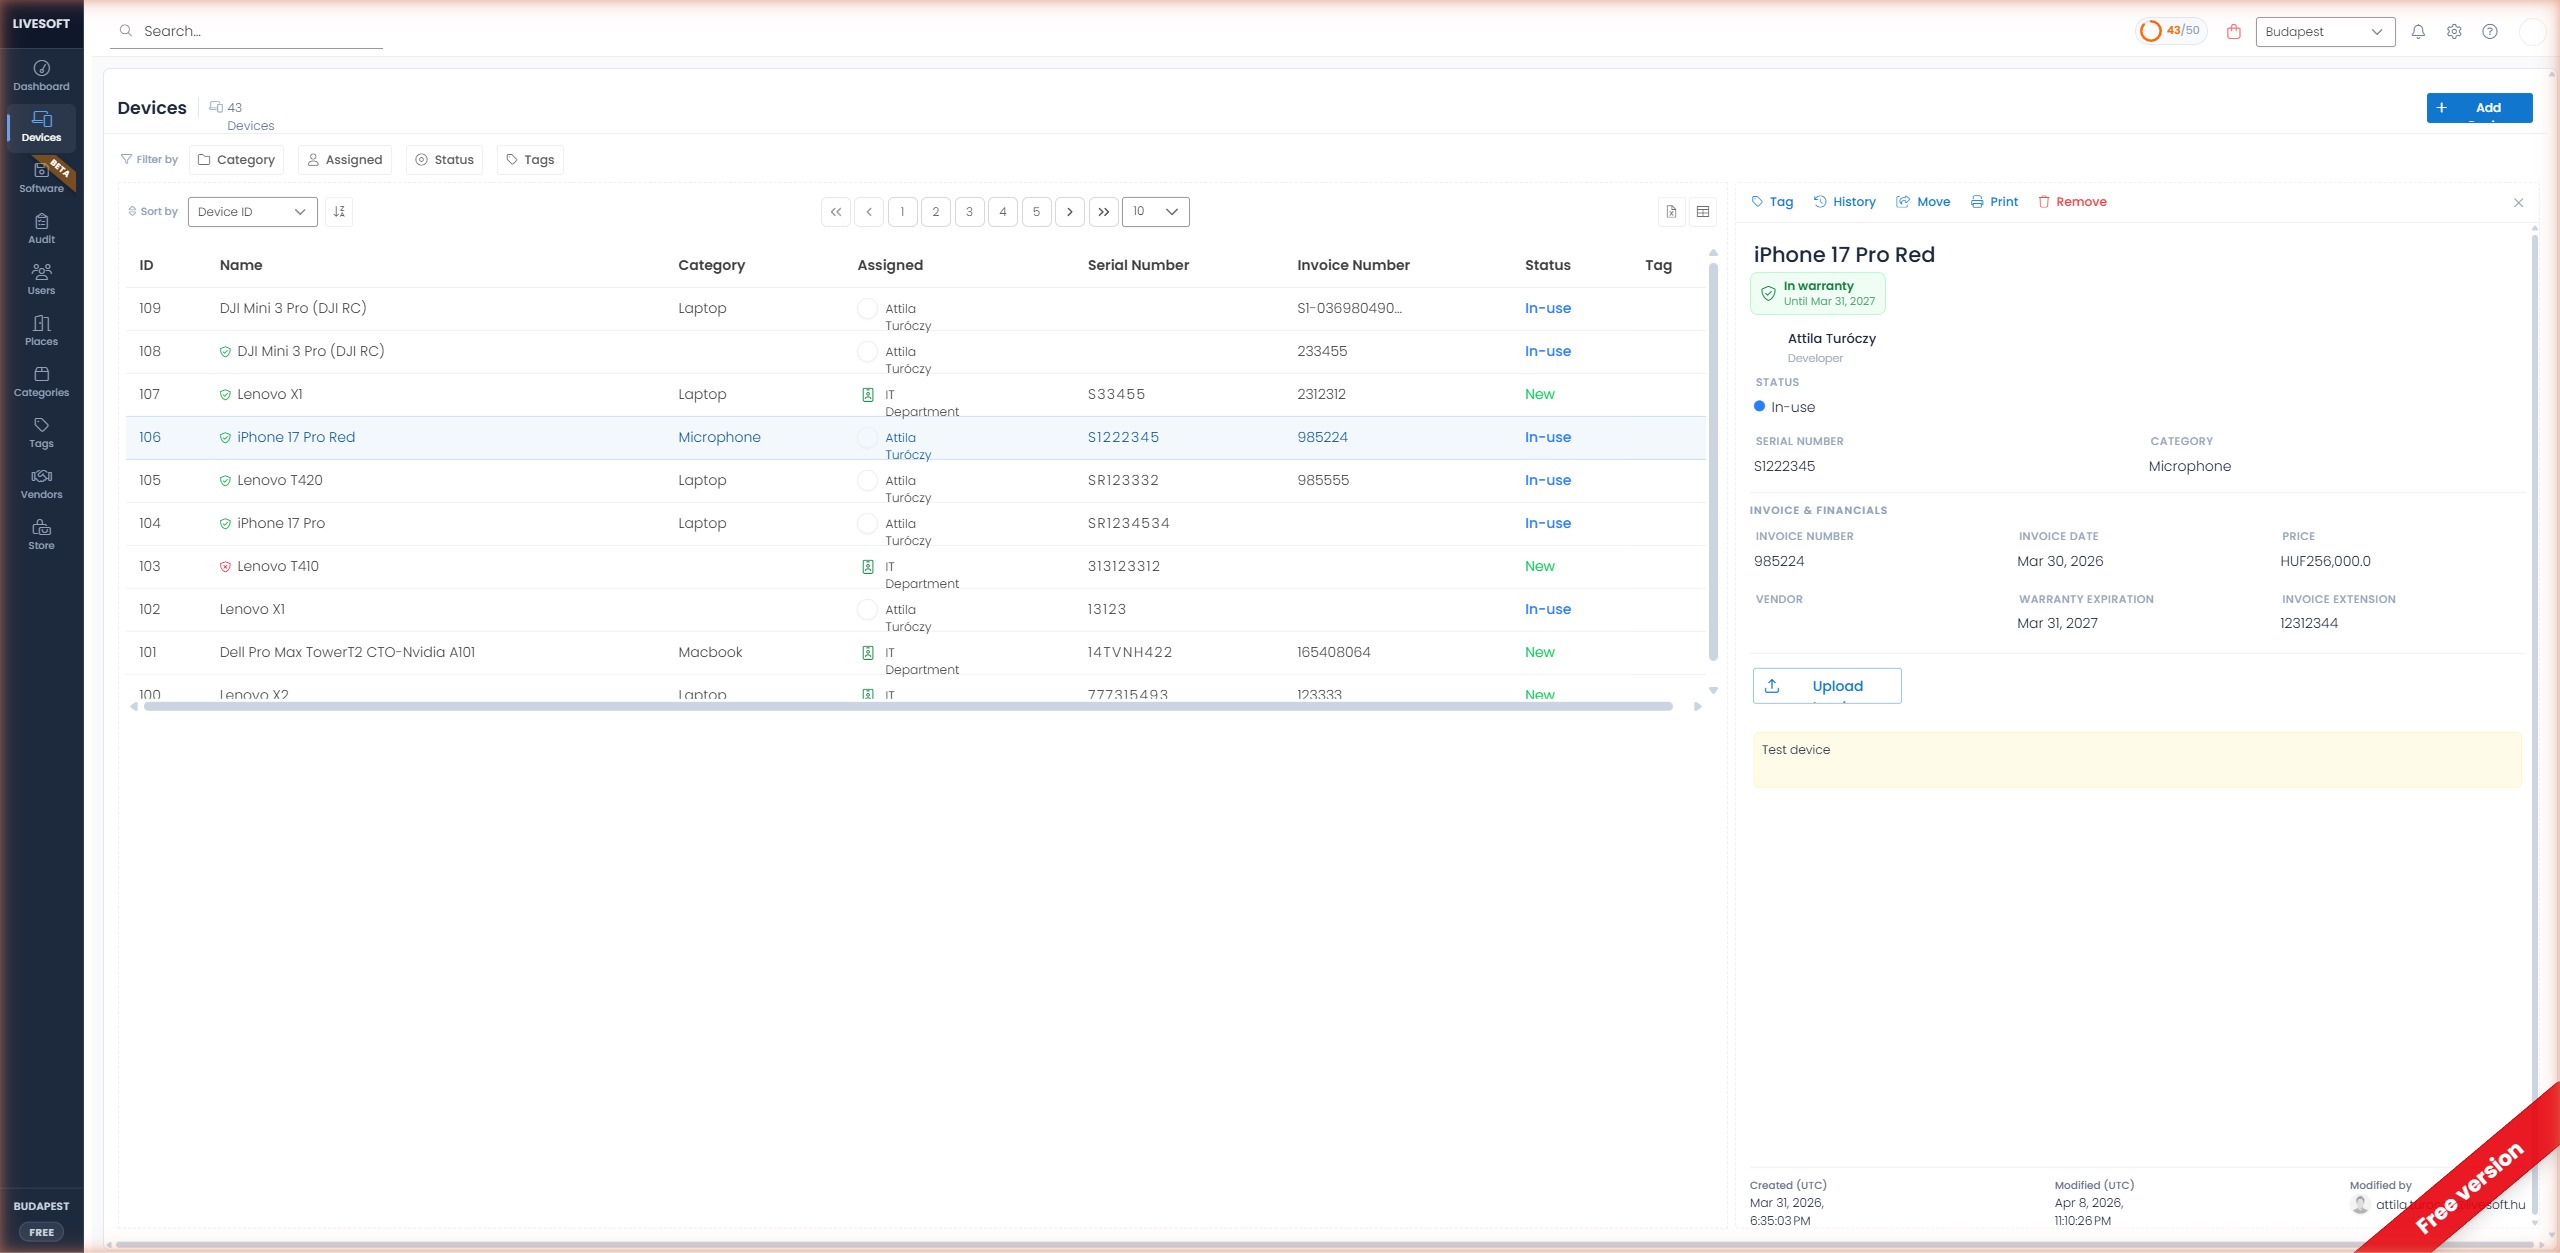
Top action bar
| Action | Description |
|---|---|
| Tag | Assign or remove a tag. |
| History | Open the full device history log. |
| Move | Transfer the device to another tenant. |
| Print a device label or summary. | |
| Remove | Permanently delete the device. See Delete a Device. |
Device header
- Device name -- shown at the top.
- Warranty badge -- green In warranty pill with the expiration date, or red Warranty expired pill.
- Assignment card -- assigned user (avatar + name + title) or IT Department / Place.
Status section
Current status of the device with a colored dot and label (e.g. blue dot + In-use).
Device data
- Serial Number -- device serial number.
- Category -- device category.
- Category metadata -- custom fields defined for the category (e.g. CPU, RAM, screen size).
Invoice & Financials
- Invoice Number
- Invoice Date
- Price -- original price; the converted price in your default currency is shown below if different.
- Vendor
- Warranty Expiration
- Invoice Extension -- custom company-specific field.
- Upload Invoice -- attach a PDF invoice (when enabled in Invoice & Currency).
Comments
Comments are displayed with a yellow background for quick visibility. Editing is inline -- simply click to type and click elsewhere to auto-save.
Footer
- Created (UTC) -- creation timestamp.
- Modified (UTC) -- last modification timestamp.
- Modified by -- user who made the last change.
Close the panel using the X button in the top-right corner, or click the selected row again.
You can also right-click a device to open a context menu with quick actions (Add to eStore, Copy, Move, Delete, Show History).