Create a New Device
Add a device — laptop, monitor, mobile, anything with a serial number — to your inventory.
- Open Devices from the sidebar.
- Click + Add Device in the top-right corner.
- Fill in the Add Device panel that slides in from the right. Only the device name is required; everything else is optional and can be added later.
- Click Save Device in the bottom-right to create the record.
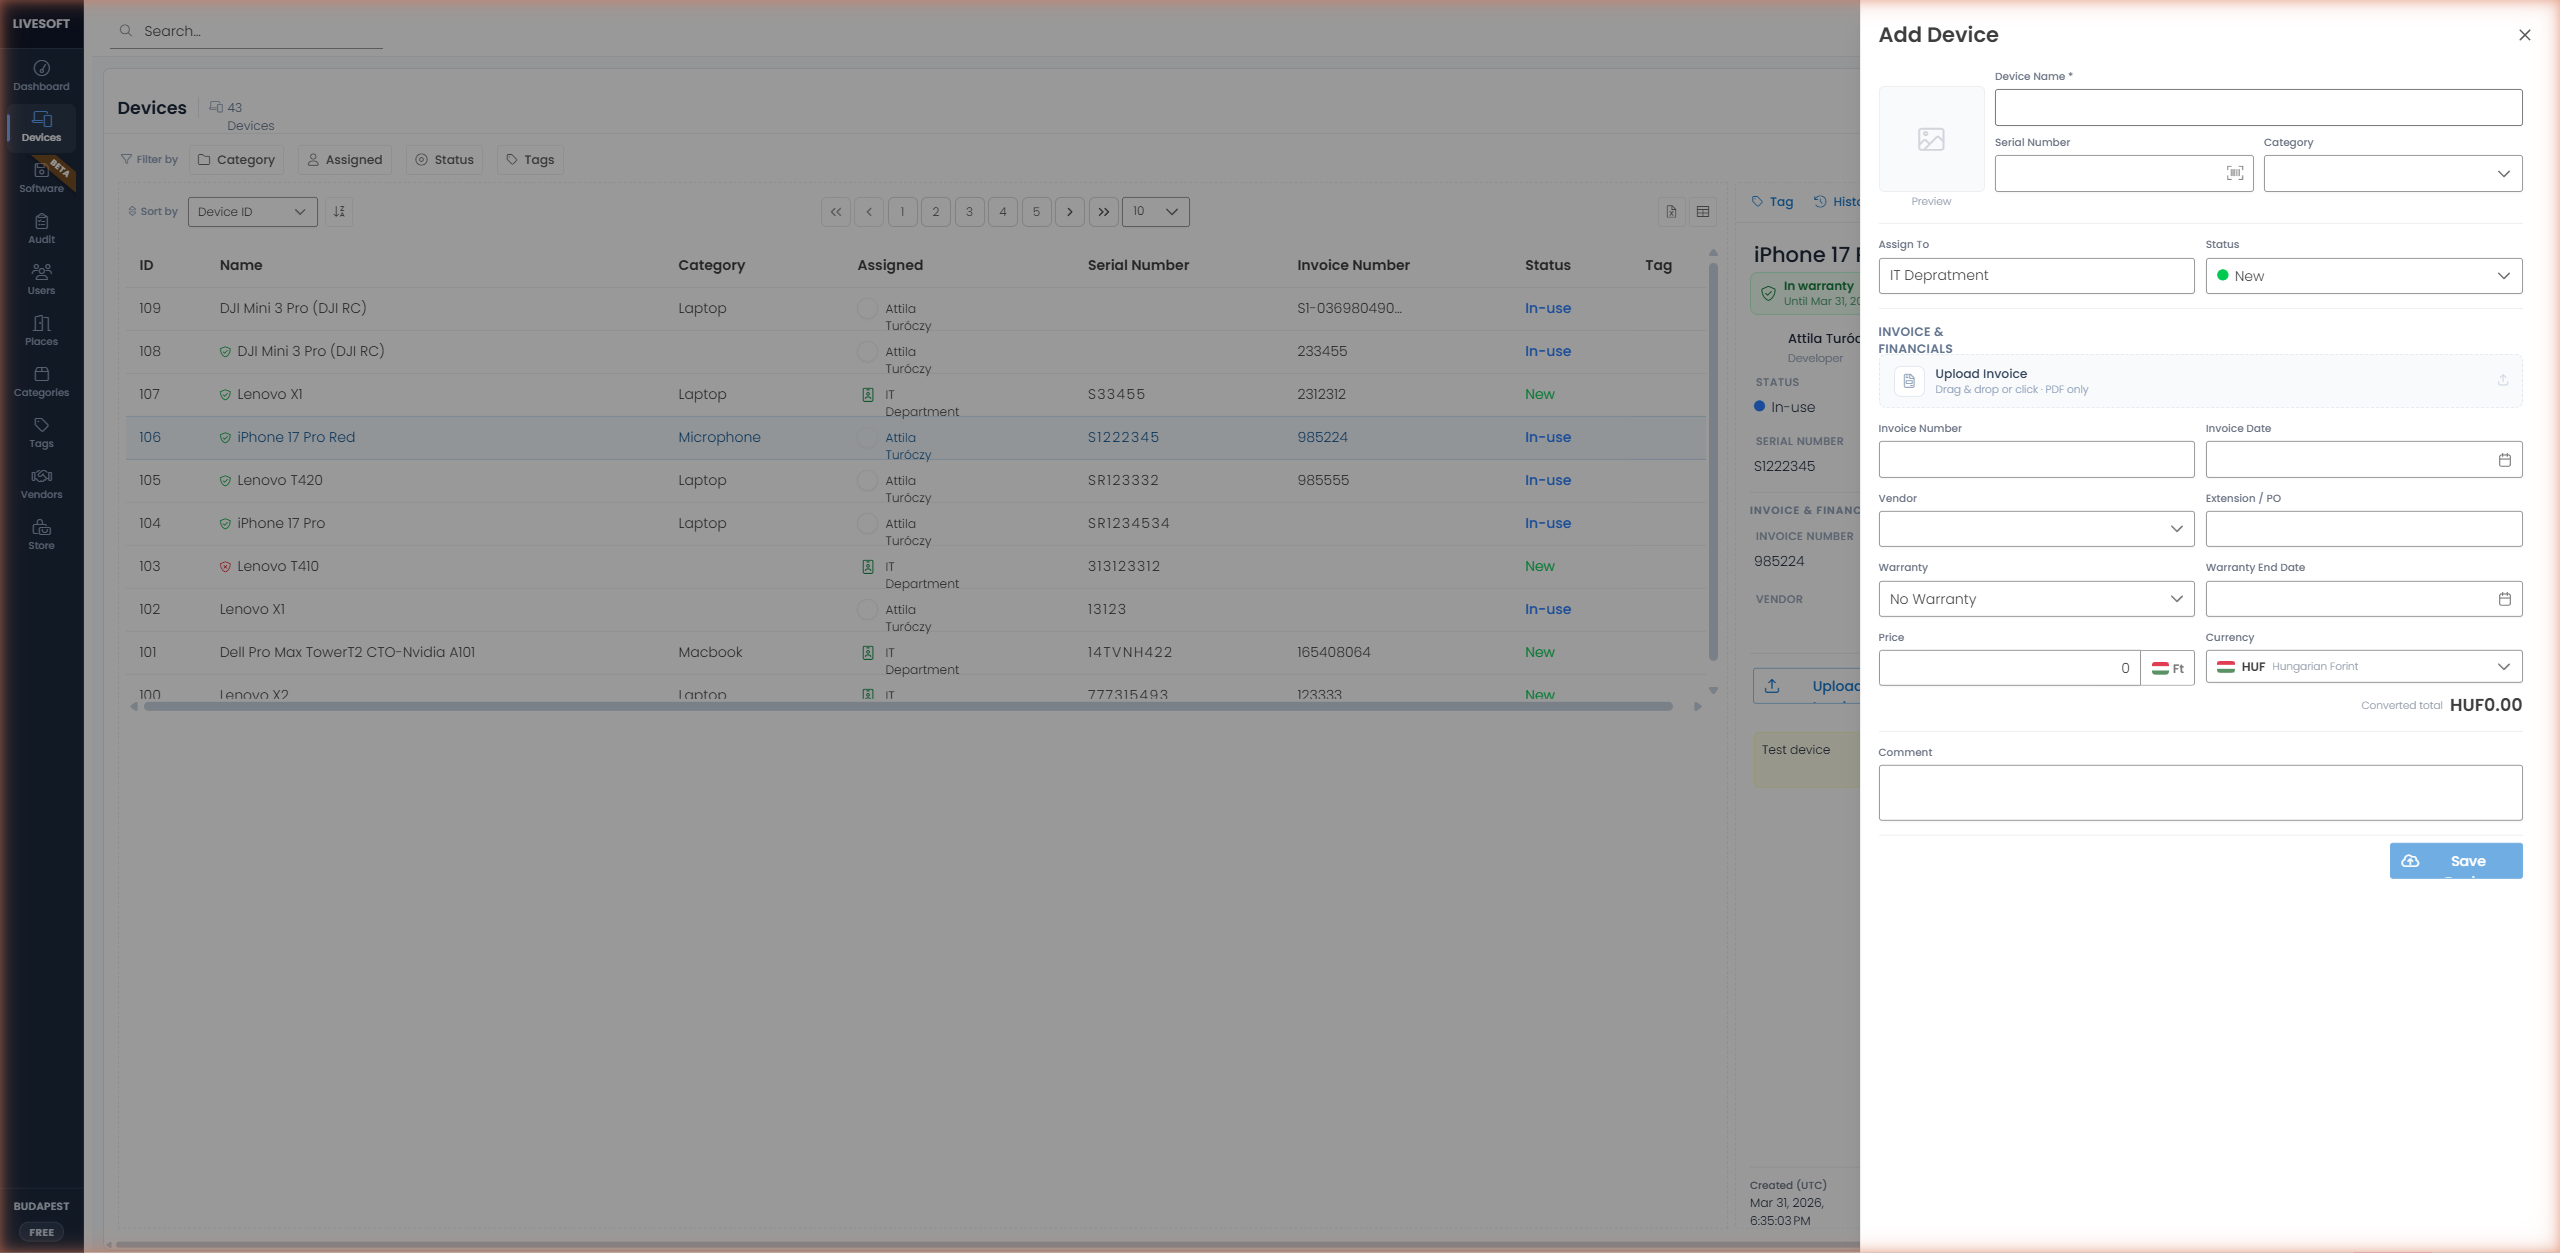
The Add Device panel is organised top to bottom into the following sections.
Device Identity
| Field | Required | Description |
|---|---|---|
| Device Name | Yes | 2–100 characters. Shown everywhere the device is referenced. |
| Serial Number | No | Up to 30 characters. Needed for Intune matching. |
| Category | No | Select an existing category. Category metadata fields appear inline when selected. |
| Preview image | No | Click the Preview thumbnail to upload a product image. Used as the tile image in card view. |
Assignment & Status
- Assign To -- defaults to IT Department or your configured default place. Click the field to assign to an employee (start typing a name), a place, or Assign back to IT.
- Status -- defaults to New when assigned to IT, or In-use when assigned to a user or a place. Change it manually from the dropdown to any of the available statuses.
See Assign a Device for the full assignment workflow.
Invoice & Financials
The Invoice & Financials section appears only when Invoice Management is enabled in Invoice & Currency.
Upload Invoice
Drag & drop a PDF invoice onto the Upload Invoice area, or click to browse. Maximum 2 MB per file.
After uploading, the following actions are available on the attached invoice:
- Preview (eye icon) -- open the PDF in a new tab.
- Recognize data with AI (sparkles icon) -- extract invoice number, date, vendor, price, and currency automatically. A confidence indicator shows the AI's certainty per field. Accept fields with the check icon or dismiss with the X.
- Delete (bin icon) -- soft-delete the attachment. Files are permanently removed after 14 days; contact support to recover within that window.
Invoices are stored in encrypted blob storage in the Microsoft Azure West EU datacenter. Downloads use short-lived SAS tokens (valid for 30 minutes) and require an Administrator, Contributor, or Supervisor role. Storage is encrypted at rest with AES-256.
Invoice fields
| Field | Description |
|---|---|
| Invoice Number | Your invoice reference. |
| Invoice Date | Date picker. |
| Vendor | Existing vendor. Use the blue + icon (or AI Recognize) to add a new vendor inline. |
| Extension / PO | Custom field, e.g. purchase order number or cost-center ID. Appears only when custom invoice data is enabled. |
Warranty
| Field | Description |
|---|---|
| Warranty | Duration dropdown: No Warranty, 1, 2, 3, 4, 5, or 10 years. |
| Warranty End Date | Exact expiration date. Combined with the duration to drive the warranty shield on the device tile -- see Warranty Management. |
Price & Currency
| Field | Description |
|---|---|
| Price | Numeric purchase price (up to 8 characters). |
| Currency | Currency of the entered price. Flag icons indicate the currency. |
A Converted total in your default currency is displayed below the price using the daily exchange rate.
Default currency is configured in Settings → Invoice & Currency → Default Currency.
Comment
An optional free-text comment, up to 200 characters. The section appears only when Device comments is enabled in Settings → Device Display → Device comments.
Save
Click Save Device in the bottom-right. The new device appears at the top of the list with an auto-assigned ID — #108, #109, and so on.