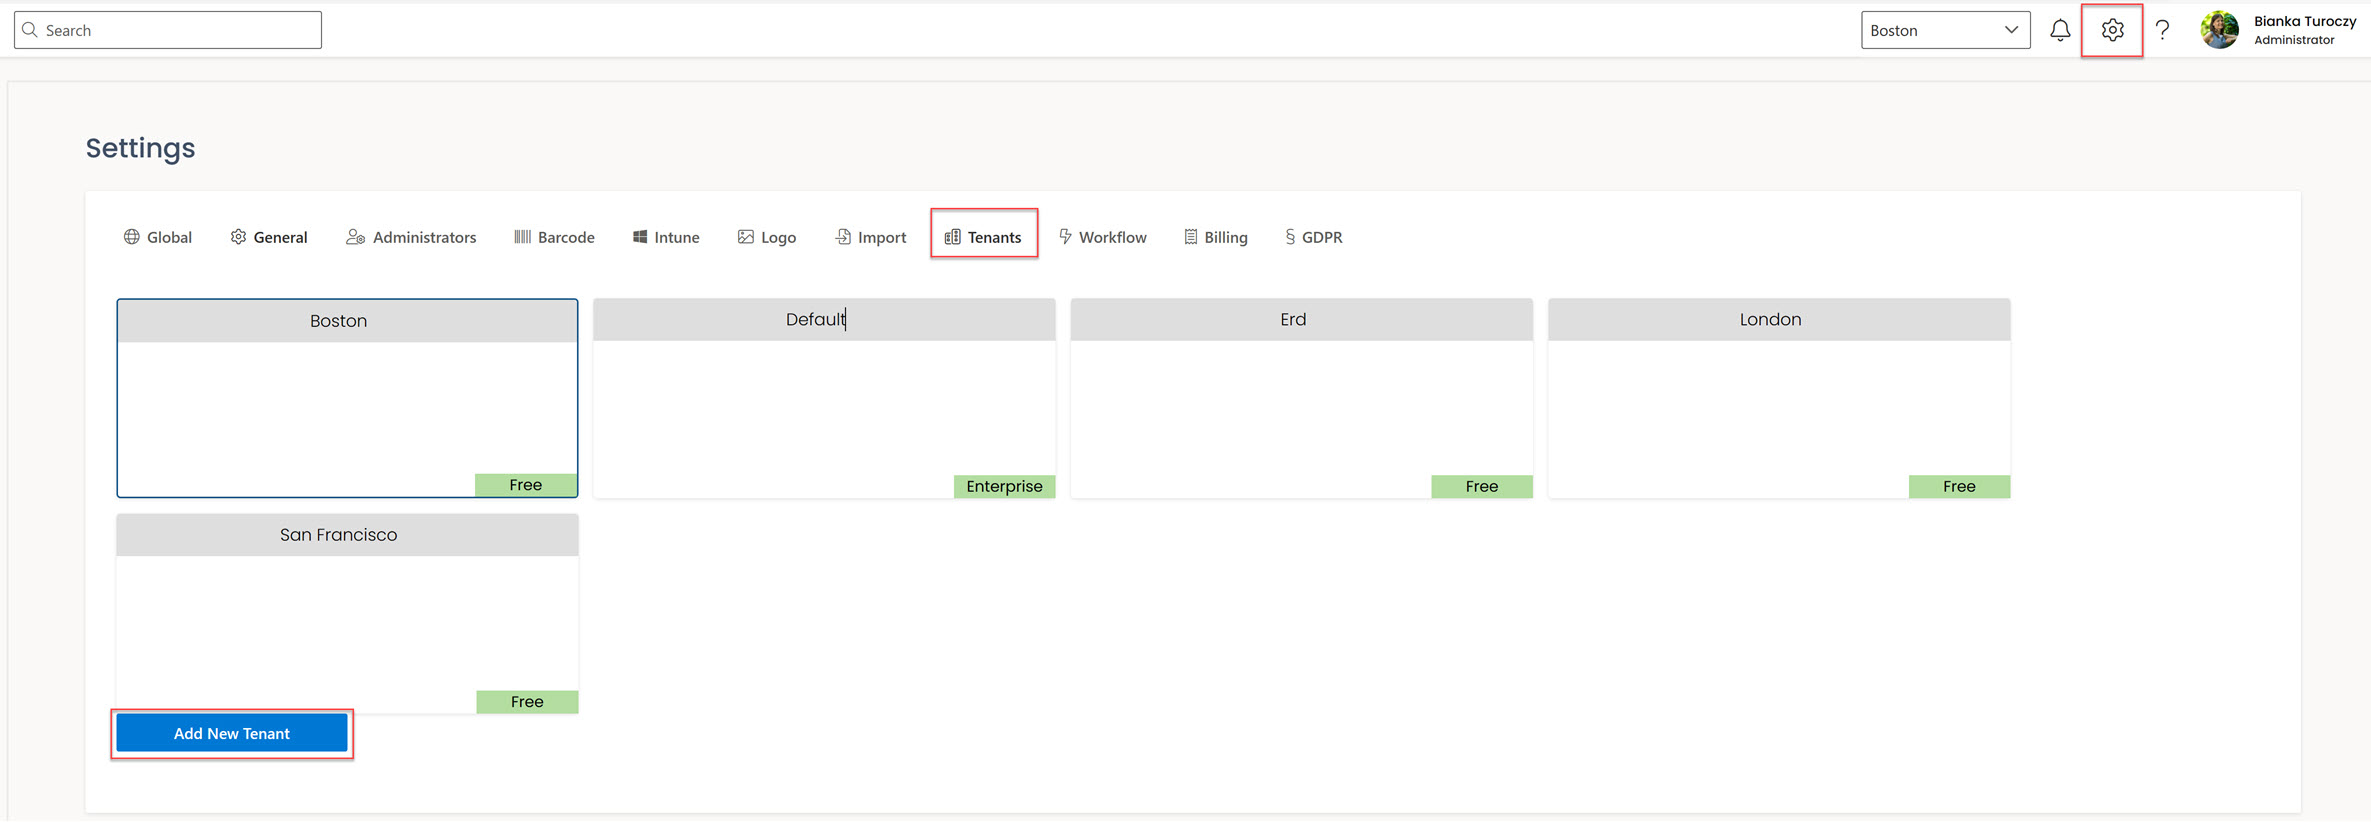
Tenants
Every company or tenant has the flexibility to create one or more tenants. Tenants offer a logical separation for devices and software within the organization. This separation can be based on various criteria, such as location, department, or any other relevant factor.
For instance, companies with multiple locations, such as Boston, Bangalore, Berlin, or Kiev, can utilize tenants to manage devices and software separately for each location. This allows for customized settings and configurations specific to each tenant, facilitating distinct workflows and requirements.
Similarly, companies can also opt to use tenants to segregate devices and software by department. If an organization has departments like HR, Support, R&D, and IT, each department can have its dedicated tenant to streamline hardware and software management processes.
The concept of tenants provides a versatile and optional logical separation, allowing companies to effectively manage their devices and software based on their unique organizational structure and needs.
Within each tenant, you have the flexibility to use the menu items independently. This means that you can customize and configure different menu items for each tenant, and they will only be visible within that specific tenant. However, the list of users remains consistent across all tenants, allowing for centralized user management.
Furthermore, each tenant has its own subscription cost. When you create a new tenant, it is free for the initial 30-day period, providing you with an opportunity to explore and evaluate its features and functionality.
How do you create a new tenant?
Click on the Settings menu located in the top right corner of the page.
Select the Tenants page from the menu.
Click on the Add New Tenant button.
Enter the desired name for the new tenant in the provided field.
Click on the Create button.
You should now see a new tenant tile appearing, confirming the successful creation of the tenant.
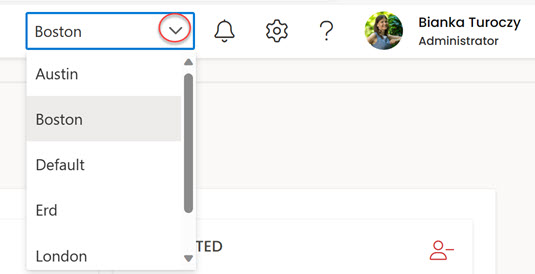
How do you change tenant to manage items?
In Settings menu
Navigate to the Settings menu in the top right corner of the page.
Select the Tenant page from the menu.
Find the tenant you want to switch and click on it.
In the pop-up window, click on the Yes button to confirm the tenant change.
From drop-down menu
When you create a new tenant, a new dropdown menu will appear at the top of the page next to the notification icon. This dropdown menu will contain all the tenants you have created already. To access another tenant, simply click on the arrow in the dropdown menu, and you can switch to a different tenant quickly and easily.
In the Settings menu, on the tenant page, there is a blue frame around the subtenant tile that you are currently viewing. This helps to avoid any confusion and ensures that you are aware of the subtenant that you are currently working on.
Every subtenant is free for the next 30 days after it has been created. If you want to extend this time, you have the opportunity to subscribe. To do this, go to the sidebar and under the company logo, you can see your subscription tier. Click on it, and the application will navigate you to the Pricing page.